It was a warm summer afternoon when I first tasted lemon cheesecake bars at a family gathering. My aunt had brought a tray of these delightful treats, and as soon as I took a bite, I was transported to a world of creamy bliss and refreshing citrus. The combination of the buttery graham cracker crust and the smooth, tangy filling was simply irresistible. I remember the laughter and chatter around the table, but all I could focus on was the burst of lemon flavor dancing on my palate.

Lemon cheesecake bars are the perfect dessert for any occasion, especially when the sun is shining and the days are long. The creamy texture melts in your mouth, while the zesty lemon adds a refreshing twist that makes them feel light and airy. Each bite is a reminder of those joyful family moments, and I can’t help but smile as I recreate this recipe in my own kitchen.
Whether you’re hosting a summer party or simply looking for an easy cheesecake dessert to brighten your day, these lemon cheesecake bars are sure to impress. With their vibrant flavor and delightful texture, they embody everything I love about spring and summer desserts. So, let’s dive into this recipe and bring a little sunshine to your table!
What is Lemon Cheesecake Bars?
Lemon cheesecake bars are a delightful dessert that beautifully marries the rich, creamy texture of cheesecake with the bright, zesty flavor of fresh lemons. Originating in the United States, these bars are a popular variation of traditional cheesecake, which has roots tracing back to ancient Greece. Over the years, cheesecake has evolved, with countless variations emerging across different cultures, but the lemon-infused version holds a special place in the hearts of many.
The American twist on cheesecake often incorporates citrus flavors, making lemon cheesecake bars a refreshing choice, especially during warmer months. The use of lemon juice and zest not only enhances the flavor but also adds a vibrant color that makes these bars visually appealing. In fact, lemon desserts are celebrated in various cuisines around the world, from the classic Italian limoncello cheesecake to the tangy lemon meringue pie found in many American households.
In many cultures, citrus desserts symbolize freshness and vitality, often enjoyed during festive occasions or family gatherings. The bright, uplifting flavor of lemon is associated with joy and celebration, making lemon cheesecake bars a perfect treat for any event. Whether served at a summer barbecue or a holiday dinner, these bars are sure to bring a smile to everyone’s face.
As you explore the world of lemon desserts, you’ll find that each recipe tells a story, reflecting the unique culinary traditions of its origin. Lemon cheesecake bars, with their creamy filling and buttery crust, are not just a dessert; they are a celebration of flavors that connect us to our loved ones and the joyful moments we share around the table.
Why You’ll Love This Lemon Cheesecake Bars
These lemon cheesecake bars are not just a dessert; they are a delightful experience that you’ll want to share with everyone. Here’s why you’ll fall in love with them:
- Easy preparation and minimal baking time: With just a few simple steps, you can whip up these bars in no time, making them perfect for busy weeknights.
- Refreshing flavor perfect for spring and summer: The bright, zesty lemon flavor is like a burst of sunshine, making these bars an ideal treat for warm weather.
- Healthier dessert option with creamy texture: Made with wholesome ingredients, these bars offer a satisfying dessert without the guilt.
- Family-friendly appeal that pleases all ages: Whether you’re serving kids or adults, everyone will enjoy the creamy, tangy goodness of these lemon cheesecake bars.
Who It’s For
This recipe is perfect for busy families looking for a quick and delicious dessert, dessert lovers who appreciate a refreshing twist, and anyone seeking easy cheesecake desserts that don’t require extensive baking skills. If you love desserts that are both simple and impressive, these lemon cheesecake bars are for you!
When to Cook It
These lemon cheesecake bars are versatile enough to be enjoyed on various occasions. They make a fantastic weeknight treat when you need something sweet after dinner. They’re also a hit at summer parties, picnics, and barbecues, where their refreshing flavor can shine. Plus, they’re a delightful addition to holiday gatherings, bringing a bright touch to your dessert table.
How to Make the Perfect Lemon Cheesecake Bars
Ingredients
To create these delightful lemon cheesecake bars, you’ll need the following ingredients:
- 1 ½ cups graham cracker crumbs: This forms the buttery crust that holds everything together. For a gluten-free option, use gluten-free graham crackers.
- ½ cup unsalted butter, melted: Adds richness and helps bind the crust.
- 2 cups cream cheese, softened: The star of the show, providing that creamy texture. You can substitute with a vegan cream cheese for a dairy-free version.
- 1 cup powdered sugar: Sweetens the filling without the graininess of granulated sugar. For a lower-calorie option, consider using powdered erythritol.
- 1 cup sour cream: Contributes to the creamy consistency and adds a slight tang. Greek yogurt can be used as a substitute for a lighter option.
- ½ cup fresh lemon juice: The key ingredient for that refreshing citrus flavor. Freshly squeezed juice is best for maximum flavor.
- 1 tablespoon lemon zest: Enhances the lemon flavor and adds a lovely aroma.
- 1 teaspoon vanilla extract: Balances the flavors and adds depth.
Each ingredient plays a vital role in achieving the perfect balance of flavors and textures in your lemon cheesecake bars. Feel free to experiment with substitutions to suit your dietary needs!
Step-by-Step Instructions
Now, let’s dive into the simple steps to make these lemon cheesecake bars:
- Preheat the oven: Set your oven to 350°F (175°C) to prepare for baking.
- Prepare the crust: In a bowl, mix the graham cracker crumbs and melted butter until well combined. The mixture should resemble wet sand.
- Press the crust: Firmly press the mixture into the bottom of a greased 9×13 inch baking dish. This creates a solid base for your bars.
- Make the filling: In a separate bowl, beat the softened cream cheese and powdered sugar until smooth and creamy. The texture should be velvety.
- Add the remaining ingredients: Mix in the sour cream, fresh lemon juice, lemon zest, and vanilla extract until everything is well combined.
- Pour and spread: Pour the cream cheese mixture over the crust and spread it evenly with a spatula.
- Bake: Place the dish in the oven and bake for 25-30 minutes or until the filling is set but still slightly jiggly in the center.
- Cool and chill: Allow the bars to cool at room temperature, then refrigerate for at least 4 hours before serving. This chilling time is crucial for the bars to firm up.
As you follow these steps, the aroma of fresh lemon will fill your kitchen, making it hard to resist sneaking a taste before they’re fully chilled!
For People with Diabetes: Sugar Substitutes
If you’re looking for sugar substitutes suitable for this recipe, consider the following options:
- Stevia: A natural sweetener that can be used in place of powdered sugar. Adjust the quantity according to your taste.
- Erythritol: A sugar alcohol that provides sweetness without the calories. It can be used in a 1:1 ratio for powdered sugar.
- Monk fruit sweetener: Another natural option that can be used similarly to stevia.
Avoid using honey or maple syrup, as they can alter the texture and flavor of the cheesecake bars. With these substitutes, you can enjoy a delicious dessert while keeping your dietary needs in mind!

Tools You’ll Need
To make your lemon cheesecake bars a success, having the right tools on hand is essential. Here’s a list of the must-have kitchen equipment, along with some easy alternatives:
- Mixing bowls: A set of mixing bowls in various sizes will help you combine ingredients easily. If you don’t have a set, any large bowl will do!
- 9×13 inch baking dish: This is the perfect size for baking your cheesecake bars. If you don’t have one, a similar-sized casserole dish can work as a substitute.
- Electric mixer: An electric mixer makes it easy to achieve a smooth filling. If you don’t have one, a whisk and some elbow grease will do the trick!
- Spatula: A rubber or silicone spatula is great for spreading the filling evenly over the crust. If you don’t have one, a large spoon can work in a pinch.
- Measuring cups and spoons: Accurate measurements are key to baking success. If you don’t have a set, use any standard cup or spoon you have at home, just keep the ratios consistent.
- Plastic wrap or aluminum foil: For covering the bars while they chill in the refrigerator. If you don’t have either, a large plate can be used to cover the dish.
With these tools, you’ll be well-equipped to create your delicious lemon cheesecake bars. Happy baking!
Tips from Well-Known Chefs
When it comes to making the perfect lemon cheesecake bars, even the pros have some invaluable tips to share. Here are a few chef-approved hacks that will elevate your dessert game:
- Use room temperature ingredients: Many chefs emphasize the importance of using room temperature cream cheese and sour cream. This ensures a smooth, lump-free filling. Take them out of the fridge at least 30 minutes before you start mixing.
- Don’t overmix: While it’s tempting to whip the filling until it’s super fluffy, overmixing can introduce too much air, leading to cracks during baking. Mix just until combined for a creamy texture.
- Chill the crust: For a firmer base, consider chilling the graham cracker crust in the refrigerator for about 15 minutes before adding the filling. This helps it hold its shape better when baked.
- Use fresh lemon juice and zest: Chefs agree that fresh ingredients make all the difference. Bottled lemon juice lacks the vibrant flavor and aroma of fresh lemons, so always opt for the real deal.
- Monitor baking time: Every oven is different, so keep an eye on your bars as they bake. They should be set around the edges but still slightly jiggly in the center. This ensures a creamy texture once cooled.
- Let them cool gradually: After baking, allow your lemon cheesecake bars to cool in the pan at room temperature before refrigerating. This gradual cooling helps prevent cracks and maintains a smooth surface.
- Top with a glaze: For an extra touch, consider drizzling a simple lemon glaze over the cooled bars. Just mix powdered sugar with a bit of lemon juice until you reach your desired consistency.
By incorporating these tips from seasoned chefs, you’ll be well on your way to creating lemon cheesecake bars that are not only delicious but also visually stunning. Happy baking!
Delicious Variations to Customize Your Recipe
One of the best things about lemon cheesecake bars is their versatility. You can easily customize this recipe to suit your taste preferences or dietary needs. Here are some delightful variations to consider:
Flavor Modifications
- Add Berries: For a burst of color and flavor, fold in fresh berries like blueberries, raspberries, or strawberries into the cream cheese mixture before pouring it over the crust. This not only adds a beautiful visual appeal but also complements the tartness of the lemon.
- Use Different Citrus: If you want to switch things up, try using lime or orange juice and zest instead of lemon. Each citrus fruit brings its unique flavor profile, creating a refreshing twist on the classic recipe.
- Chocolate Swirl: For chocolate lovers, consider adding a swirl of melted chocolate to the cream cheese filling. Simply melt some dark or white chocolate, then gently fold it into the filling before pouring it over the crust for a decadent treat.
- Herbal Infusion: For a sophisticated touch, infuse the filling with fresh herbs like basil or mint. Just chop the herbs finely and mix them into the cream cheese mixture for a unique flavor combination that pairs beautifully with lemon.
Dietary Adaptations
- Vegan Option: To make these bars vegan, substitute the cream cheese with a plant-based cream cheese alternative and use coconut cream in place of sour cream. Ensure that your graham crackers are vegan-friendly as well.
- Gluten-Free Version: Use gluten-free graham cracker crumbs or almond flour for the crust. This way, everyone can enjoy these delicious bars without worrying about gluten.
- Lower Sugar Option: For a healthier version, replace the powdered sugar with a sugar substitute like powdered erythritol or stevia. This will help reduce the overall sugar content while still keeping the sweetness intact.
These variations not only allow you to tailor the lemon cheesecake bars to your liking but also make them suitable for different dietary preferences. Feel free to experiment and find your perfect combination!
Top Tips for Perfecting Your Lemon Cheesecake Bars
Creating the perfect lemon cheesecake bars is an art that combines technique with a touch of love. Here are some expert tips and cultural secrets to ensure your bars turn out beautifully every time:
- Chill Your Ingredients: Start with room temperature cream cheese and sour cream. This helps achieve a smooth, creamy filling without lumps. Take them out of the fridge at least 30 minutes before you begin mixing.
- Don’t Overmix: While it’s tempting to whip the filling until fluffy, overmixing can introduce too much air, leading to cracks during baking. Mix just until combined for a velvety texture.
- Perfect Baking Time: Keep a close eye on your bars as they bake. They should be set around the edges but still slightly jiggly in the center. This ensures a creamy texture once cooled. Remember, they will continue to firm up as they cool.
- Gradual Cooling: After baking, let your lemon cheesecake bars cool in the pan at room temperature before refrigerating. This gradual cooling helps prevent cracks and maintains a smooth surface.
- Chill for Flavor: Allow the bars to chill in the refrigerator for at least 4 hours, or overnight if possible. This not only helps them set properly but also enhances the flavors, making each bite even more delicious.
- Use Fresh Ingredients: Always opt for fresh lemon juice and zest. The vibrant flavor of fresh lemons elevates the taste of your cheesecake bars, making them truly refreshing.
- Top with Fresh Garnishes: Consider adding a dollop of whipped cream or a sprinkle of fresh berries on top before serving. This not only adds visual appeal but also complements the tangy lemon flavor beautifully.
- Experiment with Flavors: Don’t hesitate to try different citrus fruits or add a hint of herbs like basil or mint for a unique twist. Each variation can bring a new dimension to your lemon cheesecake bars.
By following these tips, you’ll be well on your way to creating lemon cheesecake bars that are not only delicious but also visually stunning. Enjoy the process, and don’t forget to share your creations with family and friends!
Storing and Reheating Tips
Once you’ve made your delicious lemon cheesecake bars, you’ll want to ensure they stay fresh and tasty for as long as possible. Here are some practical tips for storing and reheating your bars:
Storing in the Refrigerator
- Cool Completely: Before storing, make sure your lemon cheesecake bars have cooled completely at room temperature. This prevents condensation from forming, which can make the bars soggy.
- Cover Properly: Use plastic wrap or aluminum foil to cover the baking dish tightly. Alternatively, you can transfer the bars to an airtight container. This helps keep them fresh and prevents them from absorbing any odors from the fridge.
- Refrigerate: Store your lemon cheesecake bars in the refrigerator for up to 5 days. They’ll maintain their creamy texture and refreshing flavor during this time.
Freezing for Longer Storage
- Prepare for Freezing: If you want to keep your lemon cheesecake bars for a longer period, freezing is a great option. First, let them cool completely, then cut them into individual bars.
- Wrap Each Bar: Wrap each bar tightly in plastic wrap, ensuring there are no exposed edges. This prevents freezer burn and helps maintain their flavor.
- Use a Freezer Bag: Place the wrapped bars in a freezer-safe zip-top bag or container. Label the bag with the date to keep track of how long they’ve been stored.
- Freeze: Your lemon cheesecake bars can be frozen for up to 3 months. They’ll still taste delicious when you’re ready to enjoy them again!
Reheating Tips
- Thawing: When you’re ready to enjoy your frozen lemon cheesecake bars, remove them from the freezer and let them thaw in the refrigerator overnight. This gradual thawing helps maintain their texture.
- Serving Cold: Lemon cheesecake bars are best served chilled, so there’s no need to reheat them. Simply slice and serve straight from the fridge for a refreshing treat.
- Optional Warm-Up: If you prefer a slightly warm dessert, you can microwave a bar for about 10-15 seconds. Be careful not to overheat, as this can alter the creamy texture.
By following these storing and reheating tips, you can enjoy your lemon cheesecake bars at their best, whether fresh or after some time in the fridge or freezer. Happy indulging!
Helpful Notes
As you embark on making these delightful lemon cheesecake bars, here are some extra clarifications and tips to ensure your baking experience is smooth and enjoyable:
Ingredient Prep
- Room Temperature Ingredients: For the best results, make sure your cream cheese and sour cream are at room temperature before mixing. This helps achieve a smooth, creamy filling without lumps.
- Fresh Lemon Juice and Zest: Always opt for fresh lemons when making your lemon cheesecake bars. The vibrant flavor and aroma of fresh lemon juice and zest elevate the taste significantly compared to bottled alternatives.
- Graham Cracker Crumbs: If you don’t have pre-made graham cracker crumbs, you can easily make your own by crushing whole graham crackers in a food processor or placing them in a zip-top bag and rolling over them with a rolling pin.
Potential Substitutions
- Gluten-Free Option: If you need a gluten-free version, simply use gluten-free graham cracker crumbs or almond flour for the crust.
- Dairy-Free Alternative: For a dairy-free option, substitute cream cheese with a plant-based cream cheese and use coconut cream in place of sour cream.
- Lower Sugar Version: To reduce sugar, consider using powdered erythritol or stevia in place of powdered sugar. Adjust the quantity to taste, as these sweeteners can vary in sweetness.
Cultural References
Lemon desserts have a rich history across various cultures. In Italy, for instance, limoncello is a beloved lemon liqueur often used in desserts, while in the United States, lemon meringue pie is a classic favorite. The bright, zesty flavor of lemon is often associated with freshness and vitality, making it a popular choice for spring and summer celebrations.
By keeping these helpful notes in mind, you’ll be well-prepared to create your lemon cheesecake bars with confidence and flair. Enjoy the process, and don’t hesitate to make it your own!
Common Mistakes to Avoid
When making lemon cheesecake bars, it’s easy to overlook a few key details that can affect the final result. Here are some common mistakes to watch out for:
- Overbaking: One of the most common pitfalls is baking the bars for too long. They should be set around the edges but still slightly jiggly in the center. Overbaking can lead to a dry texture.
- Not Cooling Properly: Allowing the bars to cool at room temperature before refrigerating is crucial. If you skip this step, condensation can form, making the bars soggy.
- Using Cold Ingredients: Starting with cold cream cheese or sour cream can result in a lumpy filling. Always let these ingredients come to room temperature for a smooth texture.
- Skipping the Chilling Time: Patience is key! Chilling the bars for at least 4 hours (or overnight) helps them set properly and enhances the flavors.
- Not Measuring Ingredients Accurately: Baking is a science, so precise measurements are essential. Use measuring cups and spoons for accuracy to achieve the best results.
- Using Bottled Lemon Juice: For the freshest flavor, always opt for freshly squeezed lemon juice and zest. Bottled alternatives lack the vibrant taste that makes these bars special.
- Ignoring the Crust: Make sure to press the graham cracker crust firmly into the baking dish. A loose crust can crumble when you cut the bars.
By avoiding these common mistakes, you’ll be well on your way to creating perfect lemon cheesecake bars that are sure to impress!
FAQs About Lemon Cheesecake Bars
Here are some common questions about lemon cheesecake bars, along with concise answers to help you navigate your baking journey:
- Can I make these bars ahead of time? Yes! Lemon cheesecake bars can be made a day or two in advance. Just be sure to refrigerate them until you’re ready to serve.
- Can I freeze lemon cheesecake bars? Yes, you can freeze them! Wrap individual bars tightly in plastic wrap and store them in a freezer-safe bag for up to 3 months.
- Do I have to use fresh lemon juice? It depends. While you can use bottled lemon juice in a pinch, fresh lemon juice provides a brighter, more vibrant flavor that enhances the overall taste of the bars.
- Can I substitute the cream cheese? Yes! You can use a vegan cream cheese alternative for a dairy-free version, or even Greek yogurt for a lighter option.
- Are these bars gluten-free? It depends on the ingredients you use. To make them gluten-free, simply substitute regular graham cracker crumbs with gluten-free ones.
- How long do leftovers last? Leftover lemon cheesecake bars can be stored in the refrigerator for up to 5 days. Just make sure they are covered properly to maintain freshness.
- Can I add other flavors to the bars? Yes! Feel free to experiment with different citrus fruits, berries, or even chocolate swirls to customize your lemon cheesecake bars.
Conclusion: Final Thoughts on Lemon Cheesecake Bars
As I reflect on the joy that lemon cheesecake bars bring, I can’t help but feel a warm connection to the memories they create. Each bite is not just a taste of creamy, zesty goodness; it’s a reminder of laughter-filled gatherings, sunny afternoons, and the simple pleasure of sharing delicious food with loved ones. These bars have a way of brightening any occasion, making them a cherished recipe in my kitchen.
I encourage you to try making these lemon cheesecake bars for yourself. Whether it’s for a family dinner, a summer barbecue, or just a sweet treat to enjoy at home, I promise they will not disappoint. The refreshing flavor and creamy texture are sure to win over hearts and taste buds alike.
Once you’ve made them, I would love to hear about your experience! Did you add your own twist? How did your family enjoy them? Please share your thoughts and any variations you tried in the comments below. Let’s celebrate the joy of cooking and the delightful memories we create around the table together!
Print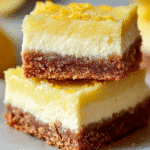
Lemon Cheesecake Bars: A Delightful Recipe for Refreshing Dessert Treats
- Total Time: 4 hours 50 minutes
- Yield: 12 servings 1x
- Diet: Vegetarian
Description
A delightful recipe for refreshing dessert treats that are perfect for any occasion.
Ingredients
- 1 ½ cups graham cracker crumbs
- ½ cup unsalted butter, melted
- 2 cups cream cheese, softened
- 1 cup powdered sugar
- 1 cup sour cream
- 1/2 cup fresh lemon juice
- 1 tablespoon lemon zest
- 1 teaspoon vanilla extract
Instructions
- Preheat the oven to 350°F (175°C).
- In a bowl, mix graham cracker crumbs and melted butter until combined.
- Press the mixture into the bottom of a greased 9×13 inch baking dish.
- In a separate bowl, beat the cream cheese and powdered sugar until smooth.
- Add sour cream, lemon juice, lemon zest, and vanilla extract; mix until well combined.
- Pour the cream cheese mixture over the crust and spread evenly.
- Bake for 25-30 minutes or until set.
- Let cool, then refrigerate for at least 4 hours before serving.
Notes
- For a stronger lemon flavor, increase the lemon juice and zest.
- These bars can be topped with whipped cream or fresh berries for added flavor.
- Store leftovers in the refrigerator for up to 5 days.
- Prep Time: 20 minutes
- Cook Time: 30 minutes
- Category: Dessert
- Method: Baking
- Cuisine: American
Nutrition
- Serving Size: 1 bar
- Calories: 250
- Sugar: 18g
- Sodium: 150mg
- Fat: 15g
- Saturated Fat: 9g
- Unsaturated Fat: 4g
- Trans Fat: 0g
- Carbohydrates: 25g
- Fiber: 1g
- Protein: 3g
- Cholesterol: 40mg
Keywords: Lemon cheesecake bars, easy cheesecake dessert, refreshing spring desserts, no-bake cheesecake recipes, creamy lemon bars, lemon dessert recipe, summer party treats