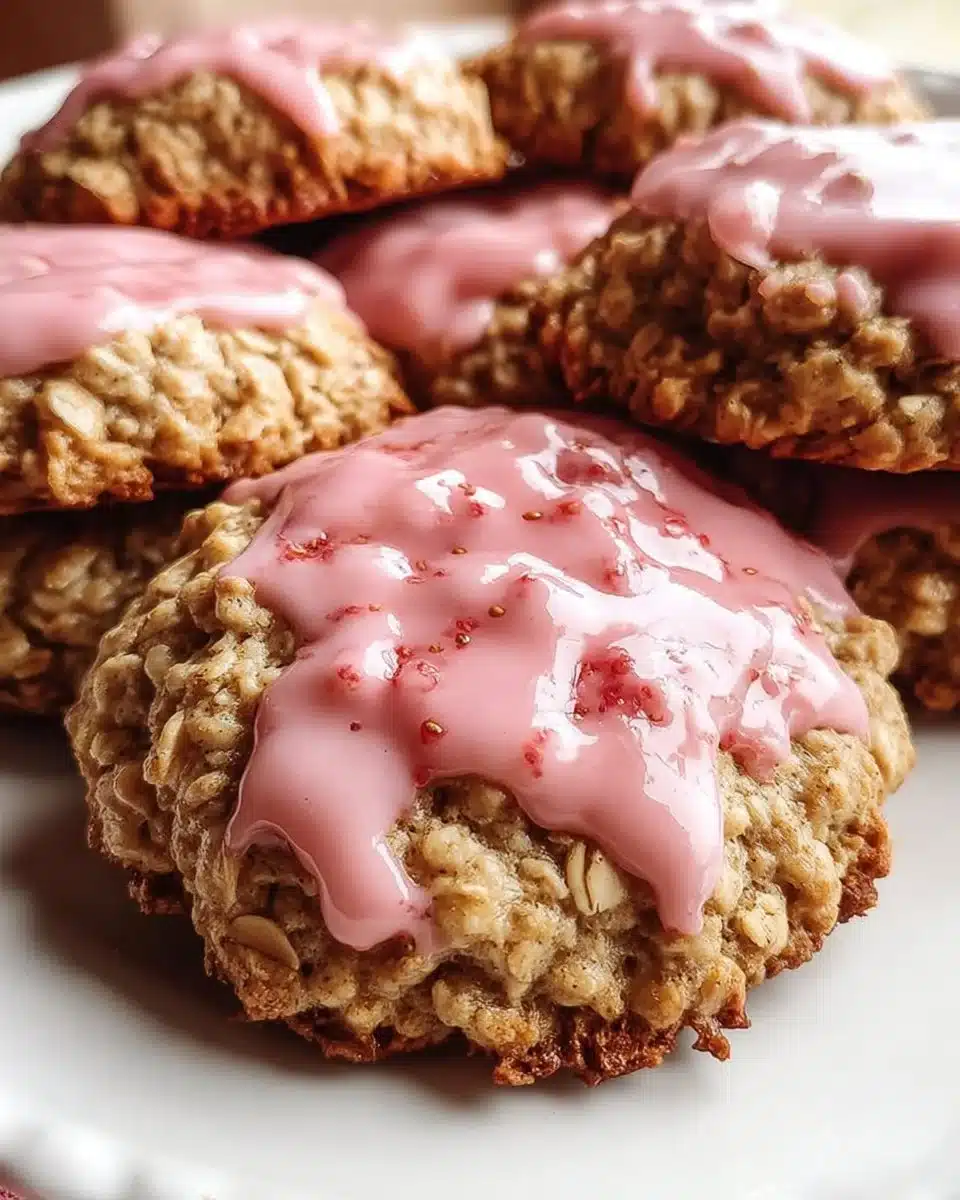
Chocolate Cherry Thumbprint Cookies: Delightful Treats for Any Occasion

This post may contain affiliate links, learn more.
There’s something magical about the aroma of freshly baked cookies wafting through the house, isn’t there? I still remember the first time I made Chocolate Cherry Thumbprint Cookies during a family gathering. The kitchen was filled with laughter, and as I pulled the cookies from the oven, the rich scent of chocolate mingled with the sweet, tart notes of cherry preserves. It was a moment of pure joy, and I knew I had stumbled upon a delightful treat that would become a staple in our home.
These cookies are not just a dessert; they are a celebration of flavors and memories. The combination of rich chocolate and luscious cherry creates a symphony of taste that dances on your palate. Whether you’re hosting a festive holiday party or simply looking for a sweet treat to enjoy after dinner, Chocolate Cherry Thumbprint Cookies fit the bill perfectly. They are versatile enough to impress guests at a gathering yet simple enough to whip up on a busy weeknight.
As you bake these cookies, you’ll find that they bring people together, sparking conversations and creating cherished moments. So, let’s dive into the world of these delightful cookies and discover how to make them a part of your own family traditions!
What is Chocolate Cherry Thumbprint Cookies?
Thumbprint cookies have a rich history that spans across various cultures, each adding its unique twist to this beloved treat. Originating in Europe, these cookies were traditionally made with a simple dough and filled with fruit preserves or nuts. Over time, they evolved into the delightful Chocolate Cherry Thumbprint Cookies we know today, combining the classic thumbprint shape with the indulgent flavors of chocolate and cherry.
The global influence of chocolate and cherries in desserts cannot be overstated. Chocolate, often referred to as “comfort food,” has a way of bringing warmth and happiness to any occasion. Meanwhile, cherries, with their sweet and tart profile, add a refreshing contrast that elevates the overall experience. Together, they create a sweet indulgence that is hard to resist, making these cookies a favorite among dessert lovers everywhere.
Why You’ll Love This Chocolate Cherry Thumbprint Cookies
- Easy preparation for home bakers of all skill levels, making it a perfect recipe for beginners.
- Rich, decadent flavor profile combining chocolate and cherry, creating a delightful taste experience.
- A healthier dessert option with the potential for ingredient substitutions, allowing for customization.
- A family-friendly treat that appeals to both kids and adults, making it a hit at any gathering.
Who It’s For
These cookies are ideal for a variety of audiences:
- Busy families looking for quick dessert options that can be made in under an hour.
- Health-conscious cooks wanting to indulge without guilt, thanks to the potential for ingredient swaps.
- Food lovers eager to explore globally inspired recipes that bring a taste of different cultures into their kitchens.
When to Cook It
There are countless occasions to bake Chocolate Cherry Thumbprint Cookies:
- As a sweet finish to weeknight family dinners, adding a touch of joy to your evening.
- During holiday celebrations and gatherings, where they can shine as a unique dessert option.
- For bake sales or potlucks, where their distinctive flavor will surely impress and delight.
How to Make the Perfect Chocolate Cherry Thumbprint Cookies
Ingredients
- 1 cup unsalted butter, softened
- 1 cup granulated sugar
- 2 large eggs
- 1 teaspoon vanilla extract
- 2 cups all-purpose flour
- 1/2 cup unsweetened cocoa powder
- 1/2 teaspoon baking powder
- 1/4 teaspoon salt
- 1 cup cherry preserves
- 1/2 cup chopped walnuts (optional)
Step-by-Step Instructions
- Preheat the oven to 350°F (175°C). The anticipation of warm cookies fills the air!
- Cream together the softened butter and granulated sugar in a large bowl until the mixture is light and fluffy. This step is crucial for a tender cookie.
- Add the eggs and vanilla extract, mixing well until fully incorporated. The aroma of vanilla will make your kitchen feel like a bakery.
- In another bowl, whisk together the flour, cocoa powder, baking powder, and salt. This ensures even distribution of the dry ingredients.
- Gradually add the dry ingredients to the wet mixture, stirring until just combined. Be careful not to overmix; we want soft, tender cookies!
- Roll the dough into 1-inch balls and place them on a baking sheet lined with parchment paper. Give them some space to spread.
- Using your thumb, make an indentation in the center of each ball. This is where the cherry preserves will go, creating a delightful surprise!
- Fill each indentation with cherry preserves. If you’re feeling adventurous, sprinkle chopped walnuts on top for added crunch.
- Bake for 12-15 minutes or until the edges are firm. The chocolatey aroma will be irresistible!
- Allow to cool on the baking sheet for a few minutes before transferring to a wire rack to cool completely. Patience is key, but the wait will be worth it!
For People with Diabetes: Sugar Substitutes
If you’re looking to enjoy Chocolate Cherry Thumbprint Cookies while managing sugar intake, consider these suitable sugar alternatives:
- Stevia – A natural sweetener with zero calories.
- Monk fruit – Another natural option that provides sweetness without the calories.
- Allulose – A low-calorie sugar that mimics the taste and texture of sugar.
It’s best to avoid using honey or maple syrup, as they contain high sugar content that may not be suitable for diabetic-friendly baking.
Tools You’ll Need
- Mixing bowls – A set of various sizes will help you combine ingredients easily.
- Baking sheet – A sturdy baking sheet is essential for even baking.
- Parchment paper – This will prevent sticking and make cleanup a breeze.
- Measuring cups and spoons – Accurate measurements are key to perfect cookies.
- Electric mixer (optional) – While a hand mixer works well, an electric mixer can save time and effort.
Top Tips from Well-Known Chefs
As I’ve learned from my time in the kitchen and from various culinary experts, there are a few simple yet effective tips that can elevate your Chocolate Cherry Thumbprint Cookies to the next level. Here are some chef-approved hacks to ensure your cookies turn out perfectly every time:
- Use room temperature ingredients: Allow your butter and eggs to sit out for about 30 minutes before you start baking. Room temperature ingredients mix more easily, resulting in a smoother dough and a tender cookie.
- Chill the dough: After mixing, consider chilling the dough for at least 30 minutes. This makes it easier to handle and helps the cookies maintain their shape while baking, preventing them from spreading too much.
- Experiment with different fruit preserves: While cherry preserves are a classic choice, don’t hesitate to try other flavors like raspberry, apricot, or even orange marmalade. Each variation brings a unique twist to the cookies, allowing you to customize them to your taste.
By incorporating these tips, you’ll not only enhance the flavor and texture of your Chocolate Cherry Thumbprint Cookies but also enjoy the baking process even more. Happy baking!
Storing and Reheating Tips
Once you’ve baked a batch of Chocolate Cherry Thumbprint Cookies, you’ll want to ensure they stay fresh and delicious for as long as possible. Here are some practical tips for storing and reheating your cookies:
- Store cookies in an airtight container: Keep your cookies in an airtight container at room temperature for up to a week. This will help maintain their soft texture and rich flavor.
- Freeze for longer storage: If you want to enjoy your cookies later, consider freezing them. Place the cookies in a single layer on a baking sheet to freeze them individually, then transfer them to a freezer-safe bag or container. They can be stored in the freezer for up to 3 months.
- Reheat in the oven: To restore the freshness of your cookies, preheat your oven to 350°F (175°C) and place the cookies on a baking sheet for about 5 minutes. This will warm them up and bring back that delightful aroma!
By following these simple storage and reheating tips, you can enjoy your Chocolate Cherry Thumbprint Cookies at their best, whether you’re savoring them fresh out of the oven or enjoying them days later. Happy snacking!
Common Mistakes to Avoid
Baking can be a delightful experience, but it’s easy to make a few missteps along the way. Here are some common pitfalls to watch out for when making Chocolate Cherry Thumbprint Cookies:
- Overmixing the dough: This can lead to tough cookies. Mix until just combined to keep them soft and tender.
- Not chilling the dough: If you skip this step, the dough may be too sticky and hard to shape. Chilling helps the cookies hold their form while baking.
- Skipping the parchment paper: This can result in cookies sticking to the baking sheet, making it difficult to remove them without breaking. Always line your baking sheet for easy cleanup!
By avoiding these common mistakes, you’ll be well on your way to baking perfect Chocolate Cherry Thumbprint Cookies that are sure to impress!
FAQs About Chocolate Cherry Thumbprint Cookies
As you embark on your baking journey with Chocolate Cherry Thumbprint Cookies, you might have a few questions. Here are some common queries and their answers to help you along the way:
- Can I use other fruit preserves instead of cherry? Yes, feel free to experiment! Raspberry, apricot, or even strawberry preserves can be delightful alternatives that add a unique twist to your cookies.
- Are these cookies gluten-free? No, these cookies are not gluten-free due to the use of all-purpose flour. However, you can substitute with a gluten-free flour blend if needed, but results may vary.
- How do I know if my cookies are done baking? It depends on your oven; baking times may vary slightly. Generally, the edges should be firm, and the centers may look slightly soft. They will continue to set as they cool.
With these FAQs in mind, you’ll be better prepared to create your own batch of delicious Chocolate Cherry Thumbprint Cookies. Happy baking!
Conclusion: Final Thoughts on Chocolate Cherry Thumbprint Cookies
As you embark on your baking adventure with Chocolate Cherry Thumbprint Cookies, I hope you find as much joy in making them as I do. These delightful treats are not just about the rich chocolate and sweet cherry flavors; they are about creating memories and sharing love through food. I encourage you to try this recipe and let your creativity shine—experiment with different preserves or add your favorite nuts!
Once you’ve baked your batch, I’d love to hear about your experiences. Did you make any unique twists? How did your family enjoy them? Please share your thoughts in the comments below. Let’s spread the joy of baking together!
Print
Chocolate Cherry Thumbprint Cookies: Delightful Treats for Any Occasion
- Total Time: 35 minutes
- Yield: 24 cookies 1x
- Diet: Vegetarian
Description
Delightful treats that combine rich chocolate and sweet cherry flavors, perfect for any occasion.
Ingredients
- 1 cup unsalted butter, softened
- 1 cup granulated sugar
- 2 large eggs
- 1 teaspoon vanilla extract
- 2 cups all-purpose flour
- 1/2 cup unsweetened cocoa powder
- 1/2 teaspoon baking powder
- 1/4 teaspoon salt
- 1 cup cherry preserves
- 1/2 cup chopped walnuts (optional)
Instructions
- Preheat the oven to 350°F (175°C).
- In a large bowl, cream together the softened butter and sugar until light and fluffy.
- Add the eggs and vanilla extract, mixing well.
- In another bowl, whisk together the flour, cocoa powder, baking powder, and salt.
- Gradually add the dry ingredients to the wet mixture, stirring until just combined.
- Roll the dough into 1-inch balls and place them on a baking sheet lined with parchment paper.
- Using your thumb, make an indentation in the center of each ball.
- Fill each indentation with cherry preserves.
- If desired, sprinkle chopped walnuts on top of the preserves.
- Bake for 12-15 minutes or until the edges are firm.
- Allow to cool on the baking sheet for a few minutes before transferring to a wire rack to cool completely.
Notes
- Store cookies in an airtight container for up to a week.
- For a variation, try using raspberry or apricot preserves instead of cherry.
- Prep Time: 20 minutes
- Cook Time: 15 minutes
- Category: Dessert
- Method: Baking
- Cuisine: American
Nutrition
- Serving Size: 1 cookie
- Calories: 150
- Sugar: 10g
- Sodium: 50mg
- Fat: 7g
- Saturated Fat: 4g
- Unsaturated Fat: 2g
- Trans Fat: 0g
- Carbohydrates: 20g
- Fiber: 1g
- Protein: 2g
- Cholesterol: 30mg