As a passionate home cook, I can’t help but reminisce about the first time I tasted the iconic Olive Garden breadsticks.

The moment I pulled one from the basket, its warm, buttery aroma enveloped me like a cozy hug. Each bite was a delightful experience, soft and pillowy, with just the right hint of garlic. Recreating these Olive Garden breadsticks at home has become a cherished tradition in my kitchen, especially during family gatherings. The joy of watching my loved ones savor these homemade delights brings me immense happiness. Let’s dive into this easy recipe that will fill your home with irresistible scents and create lasting memories around the dinner table.
What You’ll Find Here
What are Olive Garden Breadsticks?
The Olive Garden breadsticks have become a beloved staple in American dining, often associated with the warm, inviting atmosphere of the restaurant chain. Originating from Italian culinary traditions, these breadsticks are a delightful fusion of simplicity and flavor. They embody the Italian philosophy of using quality ingredients to create comforting food that brings people together.
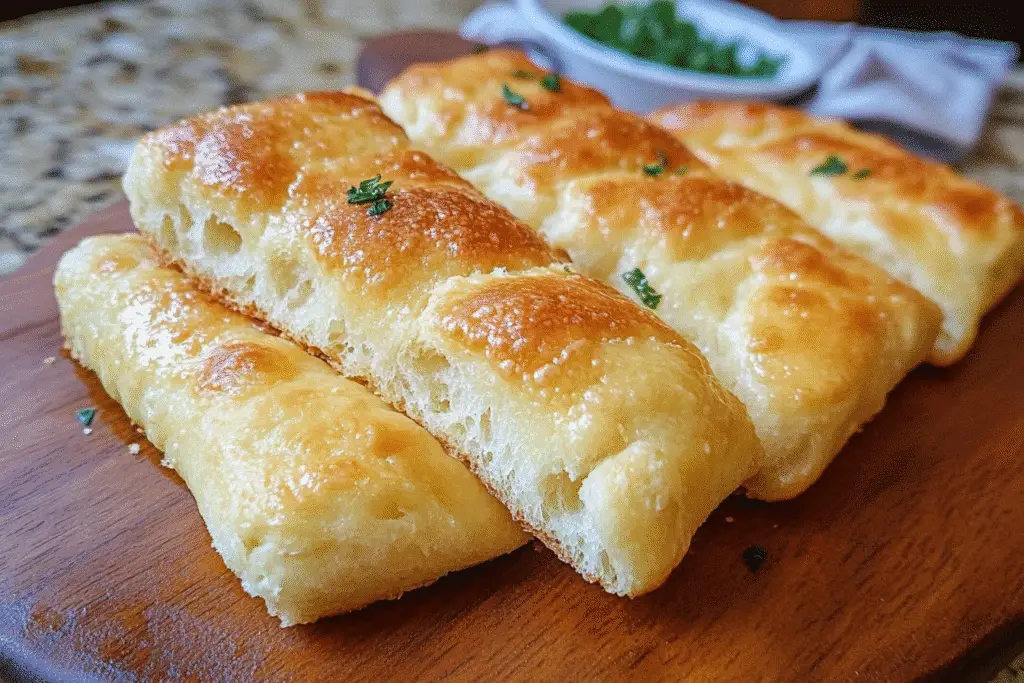
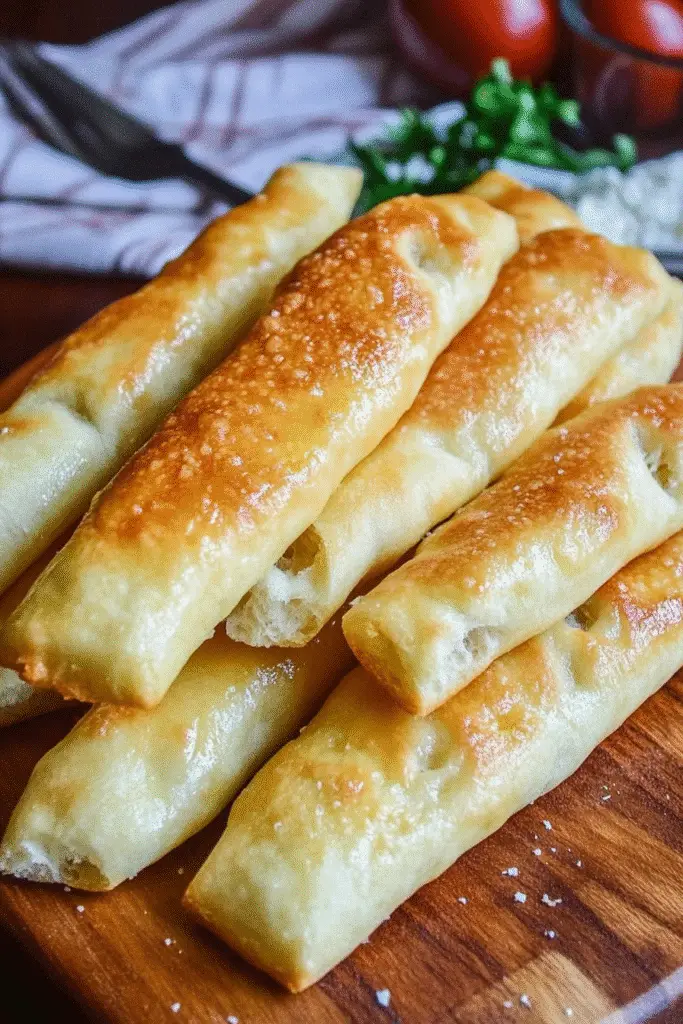
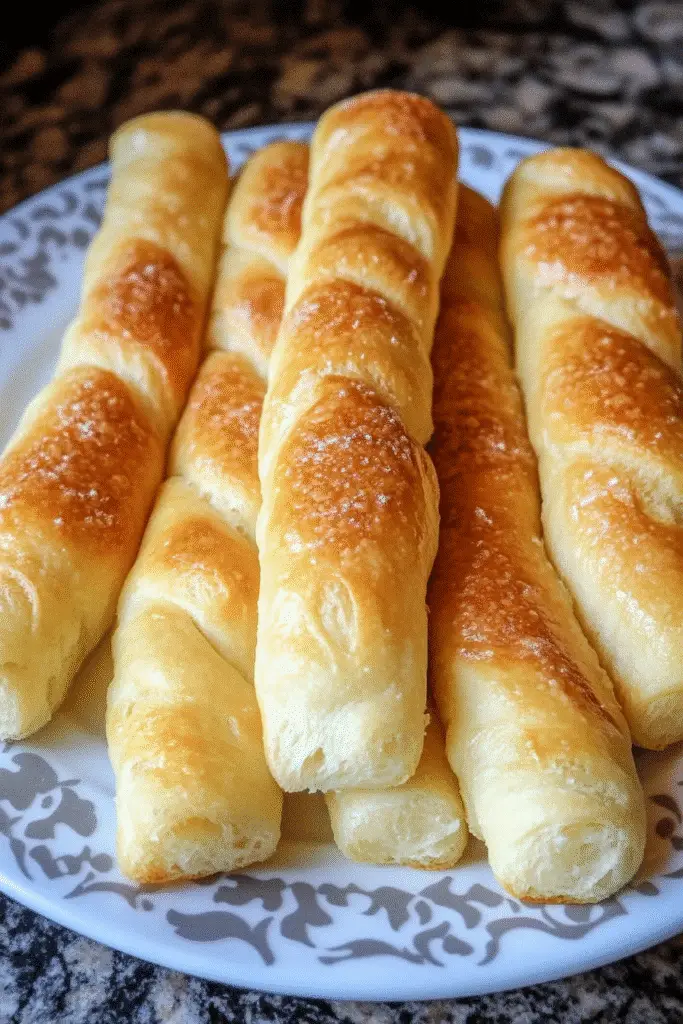
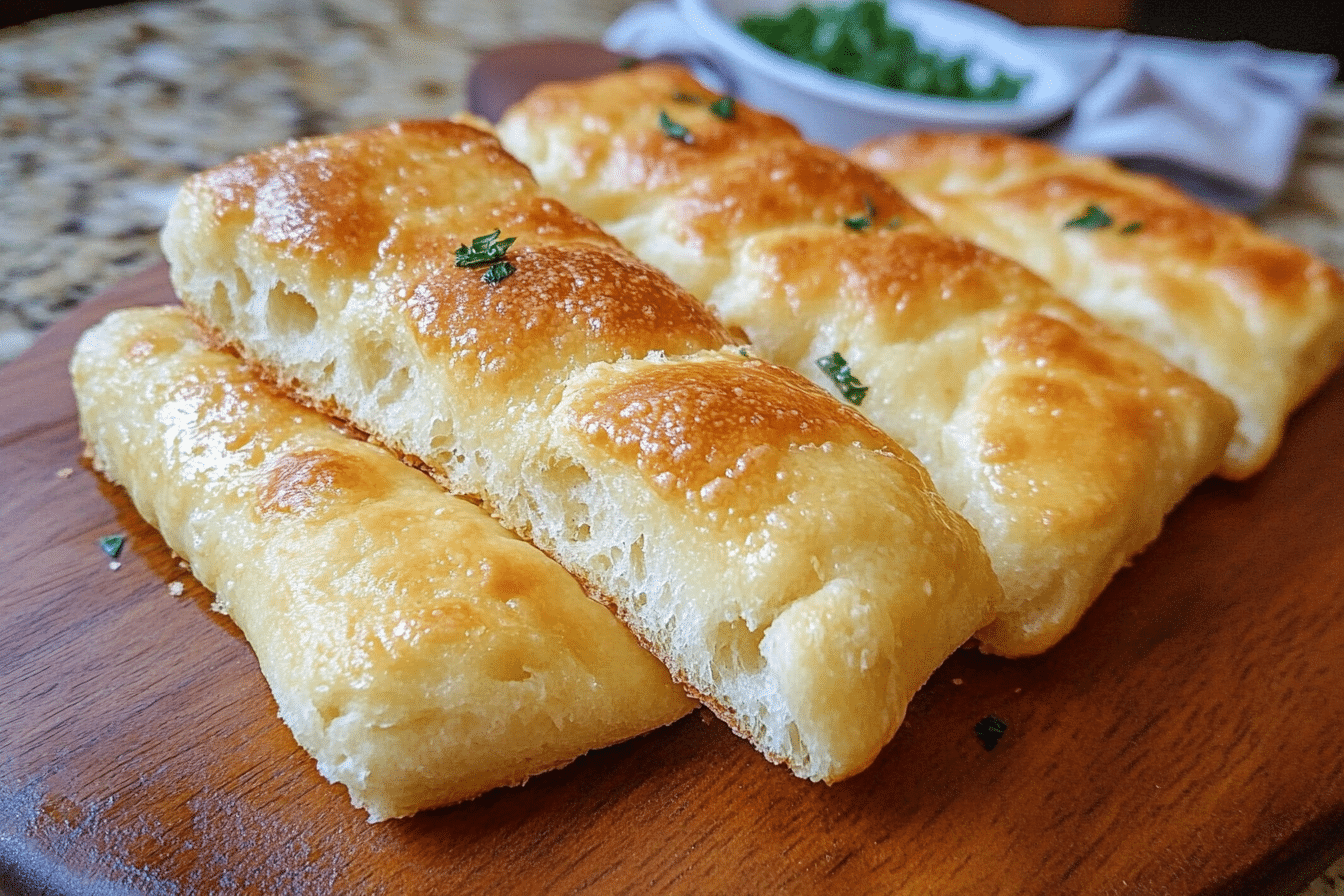
These soft, golden-brown breadsticks are typically served warm, brushed with melted butter, and sprinkled with garlic powder, making them a perfect accompaniment to any meal. Their texture is reminiscent of a cloud, light yet satisfying, and they are often enjoyed with marinara sauce or olive oil for dipping. The cultural influence of these breadsticks extends beyond just their taste; they represent the Italian tradition of sharing food and fostering connections among family and friends.
In many households, the Olive Garden breadsticks have transcended their restaurant origins, inspiring home cooks to recreate this iconic dish. The recipe has evolved, allowing for various adaptations, such as adding herbs or cheese to the dough, making them even more versatile. Whether you’re hosting a dinner party or simply enjoying a cozy night in, these breadsticks are sure to elevate your dining experience and bring a touch of Italy to your table.
Why You’ll Love This Olive Garden Breadsticks
- Convenience: This easy recipe allows you to whip up Olive Garden breadsticks in just over an hour, making it perfect for busy weeknights.
- Delicious Taste: The combination of warm, buttery breadsticks with a hint of garlic creates a flavor that’s simply irresistible.
- Health Benefits: Made with simple ingredients, these breadsticks can be customized to fit dietary preferences, such as using whole wheat flour for added fiber.
- Family Appeal: Kids and adults alike love these soft, warm breadsticks, making them a hit at family dinners and gatherings.
- Versatile Pairing: Serve them with marinara sauce, olive oil, or your favorite soup for a delightful meal that everyone will enjoy.
Who It’s For
This recipe is ideal for busy families looking to create a comforting meal without spending hours in the kitchen. It’s also perfect for health-conscious cooks who want to control the ingredients in their bread. Food lovers who appreciate the art of homemade bread will find joy in crafting these Olive Garden breadsticks from scratch, making it a delightful experience for all.
When to Cook It
These breadsticks are perfect for a variety of occasions. Whether you’re preparing a cozy weeknight dinner, celebrating a special occasion, or hosting a family gathering, they add a touch of warmth and comfort to any meal. They also make a fantastic addition to potlucks or as a side for your favorite Italian dishes, ensuring that every bite is filled with love and flavor.

How to Make the Perfect Olive Garden Breadsticks
Ingredients
- 4 cups all-purpose flour: This is the base of your breadsticks, providing structure and texture. You can substitute with whole wheat flour for a healthier option.
- 1 tablespoon sugar: This helps activate the yeast and adds a touch of sweetness. For a sugar-free alternative, consider using stevia or monk fruit.
- 1 tablespoon salt: Essential for flavor, it enhances the overall taste of the breadsticks.
- 1 packet (2 1/4 teaspoons) active dry yeast: The key ingredient that makes your breadsticks rise and become fluffy.
- 1 1/2 cups warm water (110°F): Activates the yeast; make sure it’s not too hot to avoid killing the yeast.
- 1/4 cup unsalted butter, melted: Adds richness and flavor; you can use olive oil as a healthier alternative.
- Garlic powder, to taste: For that signature Olive Garden flavor; feel free to adjust based on your preference.
- Parmesan cheese, for topping: Adds a savory finish; you can omit it for a dairy-free version.
Step-by-Step Instructions
- In a bowl, combine warm water and sugar, then sprinkle the yeast on top. Let it sit for about 5 minutes until frothy, like a bubbly cloud forming on a sunny day.
- In a large mixing bowl, combine flour and salt. Add the yeast mixture and melted butter, mixing until a dough forms. The dough should feel soft and slightly sticky.
- Knead the dough on a floured surface for about 5-7 minutes until smooth. It should feel like a soft pillow under your hands.
- Place the dough in a greased bowl, cover it, and let it rise in a warm place for about 1 hour or until doubled in size. This is where the magic happens!
- Preheat the oven to 400°F (200°C) while you wait, filling your kitchen with anticipation.
- Punch down the dough and divide it into 12 equal pieces. Roll each piece into a long stick, about 6 inches in length.
- Place the breadsticks on a greased baking sheet and let them rise for another 20 minutes. They’ll puff up beautifully!
- Bake for 12-15 minutes or until golden brown, filling your home with an irresistible aroma.
- Brush with melted butter and sprinkle with garlic powder and Parmesan cheese before serving. Enjoy the warm, buttery goodness!
For People with Diabetes: Sugar Substitutes
If you’re looking for sugar substitutes, consider using stevia, monk fruit, erythritol, or allulose. These options provide sweetness without the blood sugar spike. Avoid using honey or maple syrup, as they can raise blood sugar levels.
Tools You’ll Need
- Mixing Bowls: A large mixing bowl for combining ingredients and a smaller bowl for activating the yeast. You can use any bowl you have on hand.
- Measuring Cups and Spoons: Essential for accurate ingredient measurements. If you don’t have these, a standard coffee mug can work for dry ingredients.
- Floured Surface: A clean countertop or cutting board for kneading the dough. If you’re short on space, a large plate can suffice.
- Rolling Pin: Useful for rolling out the dough, but you can also use your hands to shape the breadsticks if you don’t have one.
- Baking Sheet: A standard baking sheet for baking the breadsticks. If you don’t have one, a cast-iron skillet or any oven-safe dish will do.
- Kitchen Towel: To cover the dough while it rises, keeping it warm. A clean dish towel or plastic wrap works just as well.
- Pastry Brush: For brushing melted butter on the breadsticks. If you don’t have one, a spoon can be used to drizzle the butter.
Tips from Well-Known Chefs
When it comes to making the perfect Olive Garden breadsticks, I’ve gathered some invaluable tips from renowned chefs that can elevate your baking game. These expert-approved hacks will ensure your breadsticks turn out soft, flavorful, and utterly irresistible.
- Use Fresh Yeast: Chef Mario Batali emphasizes the importance of using fresh yeast for the best rise. Always check the expiration date on your yeast packet to ensure it’s active.
- Let the Dough Rest: According to Chef Giada De Laurentiis, allowing the dough to rest for a few minutes after kneading can enhance its texture. This short break helps the gluten relax, making it easier to shape.
- Brush with Garlic Butter: Chef Rachael Ray suggests mixing minced garlic with melted butter for an extra burst of flavor. This simple addition can take your breadsticks to the next level.
- Experiment with Herbs: Chef Ina Garten recommends adding fresh or dried herbs like rosemary or oregano to the dough for a unique twist. This not only enhances the flavor but also adds a delightful aroma.
- Perfect Baking Temperature: Chef Thomas Keller advises preheating your oven thoroughly before baking. A hot oven ensures that your breadsticks rise quickly and develop a beautiful golden crust.
By incorporating these chef-approved tips, you’ll be well on your way to mastering the art of homemade Olive Garden breadsticks. Each bite will be a testament to your culinary skills and a delightful treat for your family and friends!
Delicious Variations to Customize Your Breadsticks
One of the joys of making homemade breadsticks is the opportunity to get creative and tailor them to your taste preferences. Here are some delightful variations to consider, ensuring that every batch of breadsticks is a unique experience:
- Herb-Infused Breadsticks: Add a tablespoon of dried herbs like rosemary, thyme, or oregano to the dough for a fragrant twist. Fresh herbs can also be used for a more vibrant flavor.
- Cheesy Breadsticks: Incorporate 1 cup of shredded mozzarella or cheddar cheese into the dough for a gooey, cheesy delight. You can also sprinkle extra cheese on top before baking for a melty finish.
- Spicy Garlic Breadsticks: For those who enjoy a kick, mix in red pepper flakes or finely chopped jalapeños into the dough. Brush the baked breadsticks with a garlic-infused olive oil for an extra layer of flavor.
- Sweet Cinnamon Breadsticks: Transform your breadsticks into a dessert by adding 1 tablespoon of cinnamon and 2 tablespoons of sugar to the dough. After baking, brush with melted butter and sprinkle with a cinnamon-sugar mixture.
- Whole Wheat Breadsticks: Substitute half of the all-purpose flour with whole wheat flour for a healthier option. This adds a nutty flavor and increases the fiber content, making them a wholesome choice.
- Vegan Breadsticks: Replace the butter with olive oil and use a plant-based milk instead of water to create a vegan-friendly version. These breadsticks will still be soft and delicious!
These variations not only enhance the flavor but also allow you to cater to different dietary needs and preferences. Feel free to mix and match these ideas to create your perfect batch of breadsticks, making every meal a little more special!
Top Tips for Perfecting Your Olive Garden Breadsticks
As I’ve journeyed through the world of baking, I’ve gathered some invaluable tips that can help you achieve the perfect Olive Garden breadsticks. These expert techniques and cooking hacks will ensure that your breadsticks are not only delicious but also a joy to make. Here are my top recommendations:
- Use Room Temperature Ingredients: For the best results, make sure your butter and water are at room temperature. This helps the dough come together more easily and promotes a better rise.
- Don’t Rush the Rising: Allowing the dough to rise until it has doubled in size is crucial. This step develops the gluten structure, resulting in soft, airy breadsticks. If your kitchen is cool, consider placing the dough in a slightly warm oven (turned off) to encourage rising.
- Shape with Care: When rolling out the dough, be gentle. Overworking the dough can lead to tough breadsticks. Aim for a light touch, and let the dough relax if it resists shaping.
- Experiment with Toppings: While garlic powder and Parmesan cheese are classic, don’t hesitate to get creative! Try adding sesame seeds, poppy seeds, or even a sprinkle of Italian seasoning for a unique twist.
- Brush with Butter Immediately: For that signature Olive Garden flavor, brush the breadsticks with melted butter right after they come out of the oven. This not only adds richness but also helps any toppings stick better.
- Serve Fresh: Breadsticks are best enjoyed warm and fresh out of the oven. If you have leftovers, reheat them in the oven for a few minutes to restore their softness and warmth.
By incorporating these tips into your baking routine, you’ll be well on your way to mastering the art of homemade Olive Garden breadsticks. Each batch will be a delightful addition to your meals, bringing smiles and satisfaction to your family and friends!

Storing and Reheating Tips
Once you’ve made your delicious Olive Garden breadsticks, you might find yourself with some leftovers. Don’t worry! With the right storage and reheating techniques, you can enjoy these soft, buttery delights even days later. Here’s how to keep them fresh and tasty:
Storing in the Fridge
- Cool Completely: Allow the breadsticks to cool completely at room temperature before storing. This prevents condensation, which can make them soggy.
- Wrap Tightly: Place the breadsticks in an airtight container or wrap them tightly in plastic wrap. This helps maintain their softness and prevents them from drying out.
- Refrigerate: Store them in the fridge for up to 3-4 days. They’ll still be delicious, but the texture may change slightly.
Freezing for Longer Storage
- Flash Freeze: If you want to store your Olive Garden breadsticks for a longer period, flash freeze them first. Place the cooled breadsticks on a baking sheet in a single layer and freeze for about 1-2 hours until solid.
- Store in Freezer Bags: Once frozen, transfer the breadsticks to a freezer-safe bag or container. Remove as much air as possible to prevent freezer burn.
- Label and Date: Don’t forget to label the bag with the date! Frozen breadsticks can last up to 3 months in the freezer.
Reheating Tips
- Oven Method: Preheat your oven to 350°F (175°C). Place the breadsticks on a baking sheet and cover them with aluminum foil to prevent drying out. Heat for about 10-15 minutes until warmed through.
- Microwave Method: If you’re in a hurry, you can use the microwave. Place a breadstick on a microwave-safe plate and cover it with a damp paper towel. Heat for 15-20 seconds, checking to ensure it doesn’t become tough.
- Brush with Butter: For an extra touch, brush the reheated breadsticks with melted butter and a sprinkle of garlic powder to revive that fresh-baked flavor.
By following these simple storing and reheating tips, you can enjoy your homemade Olive Garden breadsticks long after they come out of the oven, keeping the warmth and comfort alive in every bite!
Helpful Notes
As you embark on your journey to create the perfect Olive Garden breadsticks, here are some extra clarifications and tips to ensure your baking experience is smooth and enjoyable:
Ingredient Prep
- Flour: For the best results, measure your flour using the spoon-and-level method. This prevents packing and ensures you don’t end up with dense breadsticks.
- Yeast: Always check the expiration date on your yeast packet. If it’s expired, your breadsticks may not rise properly. To test if your yeast is active, mix it with warm water and sugar; it should become frothy within 5-10 minutes.
- Butter: If you forget to take your butter out of the fridge, you can soften it quickly by cutting it into small pieces or microwaving it for just a few seconds. Be careful not to melt it!
Substitutions
- Flour: If you want a healthier option, you can substitute half of the all-purpose flour with whole wheat flour. This adds a nutty flavor and increases the fiber content.
- Butter: For a dairy-free version, replace the unsalted butter with olive oil or a plant-based butter alternative. This will still yield deliciously soft breadsticks.
- Garlic Powder: If you prefer fresh garlic, you can use 1-2 cloves of minced garlic instead. Just mix it into the melted butter before brushing it on the breadsticks.
Cultural References
The Olive Garden breadsticks are not just a delicious treat; they also represent the Italian tradition of sharing food and creating connections. In Italy, bread is often served with every meal, symbolizing hospitality and warmth. By making these breadsticks at home, you’re not only enjoying a tasty dish but also embracing a cultural practice that brings people together around the table.
With these helpful notes, you’ll be well-equipped to create your own batch of Olive Garden breadsticks that are sure to impress family and friends. Happy baking!
Common Mistakes to Avoid
- Using Cold Ingredients: One of the most common mistakes is using cold water or butter. Make sure your water is warm (around 110°F) and your butter is at room temperature to ensure proper yeast activation and dough consistency.
- Skipping the Rise Time: Don’t rush the rising process! Allow the dough to double in size as instructed. Skipping this step can lead to dense, flat breadsticks instead of the light, fluffy texture you desire.
- Overworking the Dough: Kneading is essential, but overworking the dough can make your breadsticks tough. Aim for a soft, smooth texture without excessive kneading.
- Not Preheating the Oven: Always preheat your oven before baking. A hot oven is crucial for achieving that perfect golden-brown crust and fluffy interior.
- Neglecting to Brush with Butter: For that signature Olive Garden flavor, don’t forget to brush your breadsticks with melted butter right after they come out of the oven. This adds richness and enhances the overall taste.
FAQs About Olive Garden Breadsticks
Q: Can I make Olive Garden breadsticks ahead of time?
Yes, you can prepare the dough in advance and refrigerate it. Just allow it to come to room temperature before shaping and baking.
Q: Are Olive Garden breadsticks vegetarian?
Yes, the traditional recipe for Olive Garden breadsticks is vegetarian, as it contains no meat or animal-derived ingredients.
Q: Can I freeze Olive Garden breadsticks?
Yes, you can freeze the baked breadsticks. Just make sure to wrap them tightly in plastic wrap or store them in an airtight container to maintain freshness.
Q: Do Olive Garden breadsticks contain garlic?
It depends. The classic recipe includes garlic powder for flavor, but you can adjust the amount or omit it if you prefer a milder taste.
Q: How long do Olive Garden breadsticks last?
It depends on how you store them. In the fridge, they last about 3-4 days, while frozen breadsticks can last up to 3 months.
Conclusion: Final Thoughts on Olive Garden Breadsticks
As I reflect on the joy of making Olive Garden breadsticks, I’m reminded of the warmth they bring to my family gatherings. Each batch is not just a recipe; it’s a way to create cherished memories around the dinner table. I encourage you to try this easy homemade recipe and experience the delight of fresh, buttery breadsticks in your own kitchen. Don’t forget to share your baking adventures in the comments below! I’d love to hear how your breadsticks turned out and any unique twists you added. Happy baking!
Print
Olive Garden Breadsticks
- Total Time: 1 hour 30 minutes
- Yield: 12 breadsticks 1x
- Diet: Vegetarian
Description
A simple and delicious recipe to recreate the famous Olive Garden breadsticks at home.
Ingredients
- 4 cups all-purpose flour
- 1 tablespoon sugar
- 1 tablespoon salt
- 1 packet (2 1/4 teaspoons) active dry yeast
- 1 1/2 cups warm water (110°F)
- 1/4 cup unsalted butter, melted
- Garlic powder, to taste
- Parmesan cheese, for topping
Instructions
- In a bowl, combine warm water and sugar, then sprinkle yeast on top. Let it sit for about 5 minutes until frothy.
- In a large mixing bowl, combine flour and salt. Add the yeast mixture and melted butter, mixing until a dough forms.
- Knead the dough on a floured surface for about 5-7 minutes until smooth.
- Place the dough in a greased bowl, cover, and let it rise in a warm place for about 1 hour or until doubled in size.
- Preheat the oven to 400°F (200°C).
- Punch down the dough and divide it into 12 equal pieces. Roll each piece into a long stick.
- Place the breadsticks on a greased baking sheet and let them rise for another 20 minutes.
- Bake for 12-15 minutes or until golden brown.
- Brush with melted butter and sprinkle with garlic powder and Parmesan cheese before serving.
Notes
- For extra flavor, you can add herbs to the dough.
- Serve warm with marinara sauce or olive oil for dipping.
- Prep Time: 15 minutes
- Cook Time: 15 minutes
- Category: Bread
- Method: Baking
- Cuisine: Italian
Nutrition
- Serving Size: 1 breadstick
- Calories: 150
- Sugar: 1g
- Sodium: 200mg
- Fat: 5g
- Saturated Fat: 3g
- Unsaturated Fat: 2g
- Trans Fat: 0g
- Carbohydrates: 22g
- Fiber: 1g
- Protein: 4g
- Cholesterol: 15mg
Keywords: Olive Garden Breadsticks, homemade breadsticks, easy breadsticks recipe
