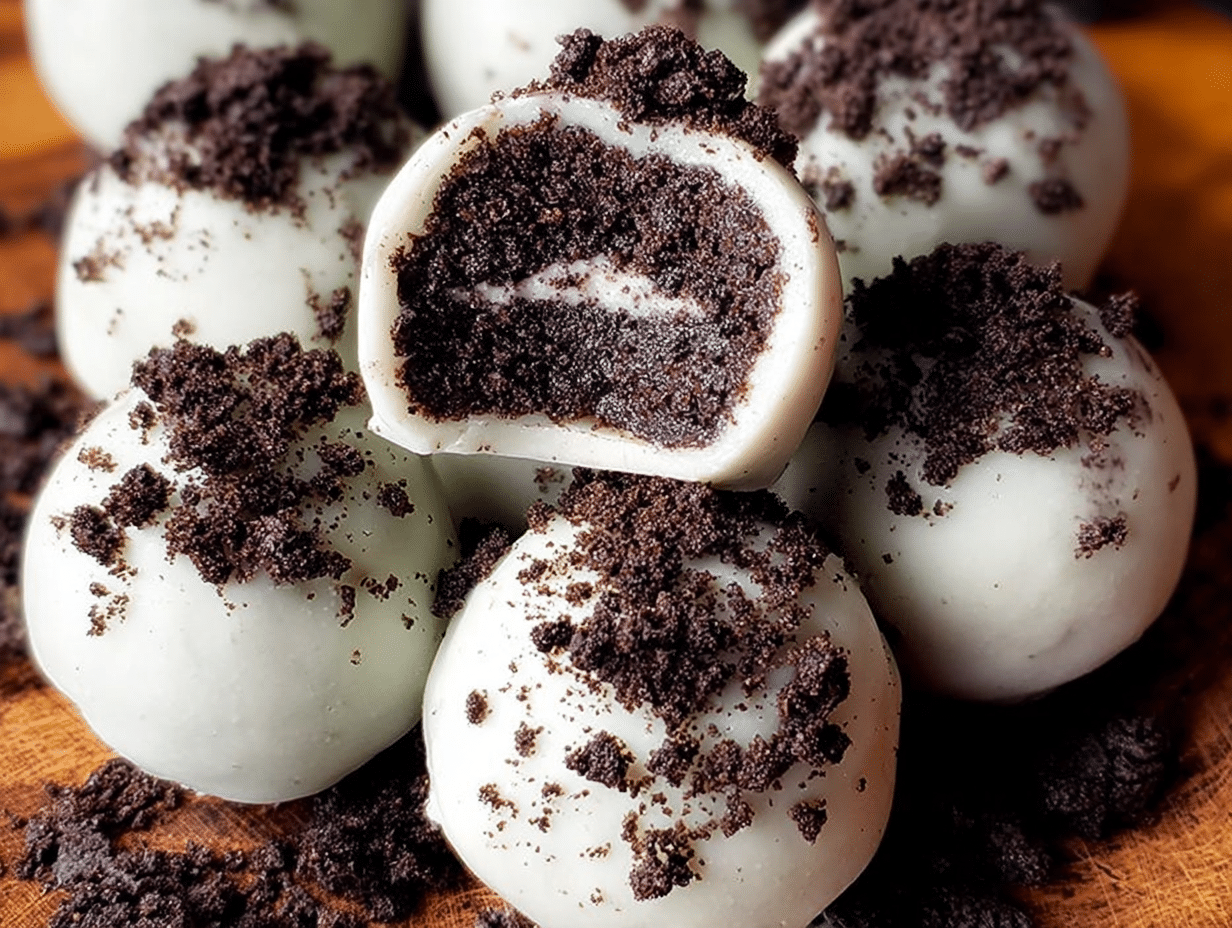
As a passionate home cook, I often find myself reminiscing about the simple joys of baking with my family. One of our all-time favorites is the delightful Oreo Balls. These little treats are not just a dessert; they are a sweet memory wrapped in chocolate. I remember the first time I made them with my kids. The kitchen was filled with laughter, and the aroma of crushed Oreos mingled with the rich scent of melting chocolate. It was a moment of pure joy, and the best part? They are incredibly easy to make!
Imagine biting into a creamy, chocolate-covered ball that bursts with the familiar taste of Oreo cookies. The combination of the crunchy cookie and the smooth cream cheese filling creates a texture that is simply irresistible. Whether you’re a busy parent looking for a quick dessert or a chocolate lover seeking a sweet indulgence, these Oreo Balls are the perfect solution. They require no baking, making them an ideal treat for any occasion, from family gatherings to cozy nights in.
In this recipe, I’ll guide you through the steps to create these delectable bites of happiness. Trust me, once you make them, they will become a staple in your dessert repertoire. So, let’s dive into the world of Oreo Balls and discover how easy it is to bring a little sweetness into your life!
What is Oreo Balls?
The delightful Oreo Balls are a no-bake dessert that has captured the hearts of chocolate lovers everywhere. Originating from the classic Oreo cookie, these treats combine crushed cookies with cream cheese, creating a rich and creamy filling that is then coated in chocolate. This simple yet indulgent recipe has become a staple in American kitchens, often shared at potlucks, birthday parties, and holiday gatherings. The beauty of Oreo Balls lies in their versatility; they can be customized with various toppings or flavors, making them a globally inspired treat that resonates with many cultures.
As I’ve explored different culinary traditions, I’ve found that desserts like these often bring people together. The joy of sharing a sweet treat transcends borders, and Oreo Balls are no exception. They embody the spirit of comfort food, reminding us of childhood memories and family gatherings. With their easy preparation and delightful taste, it’s no wonder they have become a beloved dessert for many.
Why You’ll Love This Oreo Balls
- Convenience: No baking required, making them perfect for busy schedules.
- Taste: A delicious blend of chocolate and creamy filling that satisfies any sweet tooth.
- Health Benefits: Can be made with lower-sugar options for a guilt-free treat.
- Family Appeal: Fun to make with kids, creating lasting memories in the kitchen.
Who It’s For
Oreo Balls are ideal for busy families looking for quick dessert solutions, health-conscious cooks who want to indulge without the guilt, and food lovers who appreciate a simple yet delicious treat. Whether you’re a novice in the kitchen or a seasoned chef, these treats are accessible to everyone.
When to Cook It
These delightful Oreo Balls are perfect for a variety of occasions. They shine at weeknight dinners when you need a quick dessert, at celebrations like birthdays and holidays, or even during cozy family movie nights. Their versatility makes them suitable for any moment that calls for a little sweetness!
How to Make the Perfect Oreo Balls
Ingredients
- 1 package Oreo cookies (about 36 cookies) – the star of the show, providing that classic flavor.
- 8 oz cream cheese, softened – adds creaminess and binds the cookie crumbs together.
- 16 oz chocolate coating (milk or dark chocolate) – for that luscious outer layer; choose your favorite!
- Optional: Sprinkles or crushed nuts – for added texture and visual appeal.
- Substitution: Use gluten-free Oreos for a gluten-free version.
Step-by-Step Instructions
- Start by crushing the Oreo cookies into fine crumbs. You can use a food processor for a quick job or place them in a zip-top bag and crush them with a rolling pin for a bit of fun.
- In a mixing bowl, combine the crushed Oreo cookies with the softened cream cheese. Mix until well blended; the mixture should be thick and creamy.
- Roll the mixture into small balls, about 1 inch in diameter. Place them on a baking sheet lined with parchment paper, ensuring they are spaced apart.
- Chill the balls in the refrigerator for about 30 minutes. This helps them firm up, making them easier to coat.
- While the balls are chilling, melt the chocolate coating. You can do this in a microwave-safe bowl in short bursts or use a double boiler for a more controlled melt.
- Once the Oreo balls are firm, dip each ball into the melted chocolate, ensuring they are fully coated. Let the excess chocolate drip off.
- Return the coated balls to the baking sheet and let them set until the chocolate hardens. You can speed this up by placing them back in the fridge.
- Store the Oreo Balls in the refrigerator until you’re ready to serve. Enjoy the sweet rewards of your hard work!
For People with Diabetes: Sugar Substitutes
- Stevia: A natural sweetener with zero calories, perfect for a guilt-free treat.
- Monk Fruit: Another natural option that provides sweetness without the carbs.
- Allulose: A low-calorie sugar that mimics the taste of sugar without the blood sugar spike.
- Note: Avoid using honey or maple syrup as substitutes, as they contain high amounts of sugar.
Tools You’ll Need
- Food processor or rolling pin
- Mixing bowl
- Baking sheet
- Parchment paper
- Microwave-safe bowl or double boiler
- Spatula or fork for dipping
- Refrigerator for chilling
Top Tips from Well-Known Chefs
- Use Quality Chocolate: Renowned pastry chef Jacques Torres suggests using high-quality chocolate for coating. It enhances the flavor and gives a beautiful finish.
- Chill the Mixture: Chef Ina Garten recommends chilling the Oreo mixture for about 15 minutes before rolling. This makes it easier to form perfect balls.
- Experiment with Flavors: Celebrity chef Giada De Laurentiis loves to add a splash of vanilla extract or a pinch of sea salt to the cream cheese mixture for an extra flavor boost.
- Decorate Creatively: Pastry chef Christina Tosi advises using different toppings like crushed candy canes or colorful sprinkles to make your Oreo Balls festive and fun.
- Keep It Cool: Chef Alton Brown emphasizes the importance of keeping the Oreo Balls refrigerated until serving to maintain their shape and texture.
Storing and Reheating Tips
- Refrigerator: Store Oreo Balls in an airtight container in the fridge for up to one week. This keeps them fresh and delicious.
- Freezer: For longer storage, place Oreo Balls in a single layer on a baking sheet to freeze. Once solid, transfer them to a freezer-safe container for up to three months.
- Thawing: To enjoy frozen Oreo Balls, simply transfer them to the fridge for a few hours or overnight to thaw before serving.
- Serving: Serve chilled for the best texture and flavor. If they’ve been frozen, allow them to sit at room temperature for a few minutes before enjoying.
Common Mistakes to Avoid
- Not Crushing Oreos Finely: If the cookie crumbs are too chunky, the mixture won’t hold together well, making it difficult to form balls.
- Skipping the Chilling Step: Chilling the balls before coating them in chocolate is crucial. It helps them maintain their shape and makes dipping easier.
- Using Low-Quality Chocolate: Cheap chocolate can lead to a waxy texture and less flavor. Invest in good quality chocolate for the best results.
- Overheating the Chocolate: Melting chocolate too quickly can cause it to seize. Use short bursts in the microwave or a double boiler to control the heat.
- Not Storing Properly: Leaving Oreo Balls out at room temperature can cause them to soften. Always store them in the fridge to keep them firm and fresh.
FAQs About Oreo Balls
Q: Can I use different types of Oreos for Oreo Balls?
Yes, you can use any flavor of Oreo cookies, such as mint or peanut butter, to create unique variations of Oreo Balls.
Q: Are Oreo Balls gluten-free?
No, traditional Oreo Balls are not gluten-free unless you use gluten-free Oreo cookies as a substitute.
Q: Can I make Oreo Balls ahead of time?
Yes, Oreo Balls can be made ahead of time and stored in the refrigerator for up to a week, making them a convenient treat for gatherings.
Q: Do Oreo Balls need to be refrigerated?
It depends; while they can be left out for a short time, it’s best to keep Oreo Balls refrigerated to maintain their texture and freshness.
Q: Can I freeze Oreo Balls?
Yes, you can freeze Oreo Balls for up to three months. Just make sure to store them in an airtight container for optimal freshness.
Conclusion: Final Thoughts on Oreo Balls
In conclusion, Oreo Balls are not just a delightful treat; they are a celebration of simplicity and flavor that brings families together. Whether you’re making them for a special occasion or just to satisfy a sweet craving, these no-bake delights are sure to impress. I hope you enjoy making and sharing them as much as I do! If you try this recipe, please leave a comment below and share your experience. I’d love to hear how your Oreo Balls turned out!
Print
Oreo Balls: Easy No-Bake Recipe for Chocolate Lovers
- Total Time: 45 minutes
- Yield: 36 balls 1x
- Diet: Vegetarian
Description
A simple and delicious no-bake recipe for Oreo Balls that chocolate lovers will adore.
Ingredients
- 1 package Oreo cookies (about 36 cookies)
- 8 oz cream cheese, softened
- 16 oz chocolate coating (milk or dark chocolate)
Instructions
- Crush the Oreo cookies into fine crumbs using a food processor or by placing them in a zip-top bag and crushing with a rolling pin.
- In a mixing bowl, combine the crushed Oreo cookies and softened cream cheese until well blended.
- Roll the mixture into small balls, about 1 inch in diameter, and place them on a baking sheet lined with parchment paper.
- Chill the balls in the refrigerator for about 30 minutes to firm up.
- While the balls are chilling, melt the chocolate coating in a microwave-safe bowl or using a double boiler.
- Once the Oreo balls are firm, dip each ball into the melted chocolate, ensuring they are fully coated.
- Return the coated balls to the baking sheet and let them set until the chocolate hardens.
- Store the Oreo Balls in the refrigerator until ready to serve.
Notes
- For a fun twist, you can add sprinkles or crushed nuts on top of the chocolate coating before it sets.
- These Oreo Balls can be made ahead of time and stored in the fridge for up to a week.
- Prep Time: 15 minutes
- Cook Time: 0 minutes
- Category: Dessert
- Method: No-Bake
- Cuisine: American
Nutrition
- Serving Size: 1 ball
- Calories: 120
- Sugar: 10g
- Sodium: 50mg
- Fat: 7g
- Saturated Fat: 4g
- Unsaturated Fat: 2g
- Trans Fat: 0g
- Carbohydrates: 14g
- Fiber: 1g
- Protein: 1g
- Cholesterol: 10mg
Keywords: Oreo Balls, no-bake dessert, chocolate recipe
