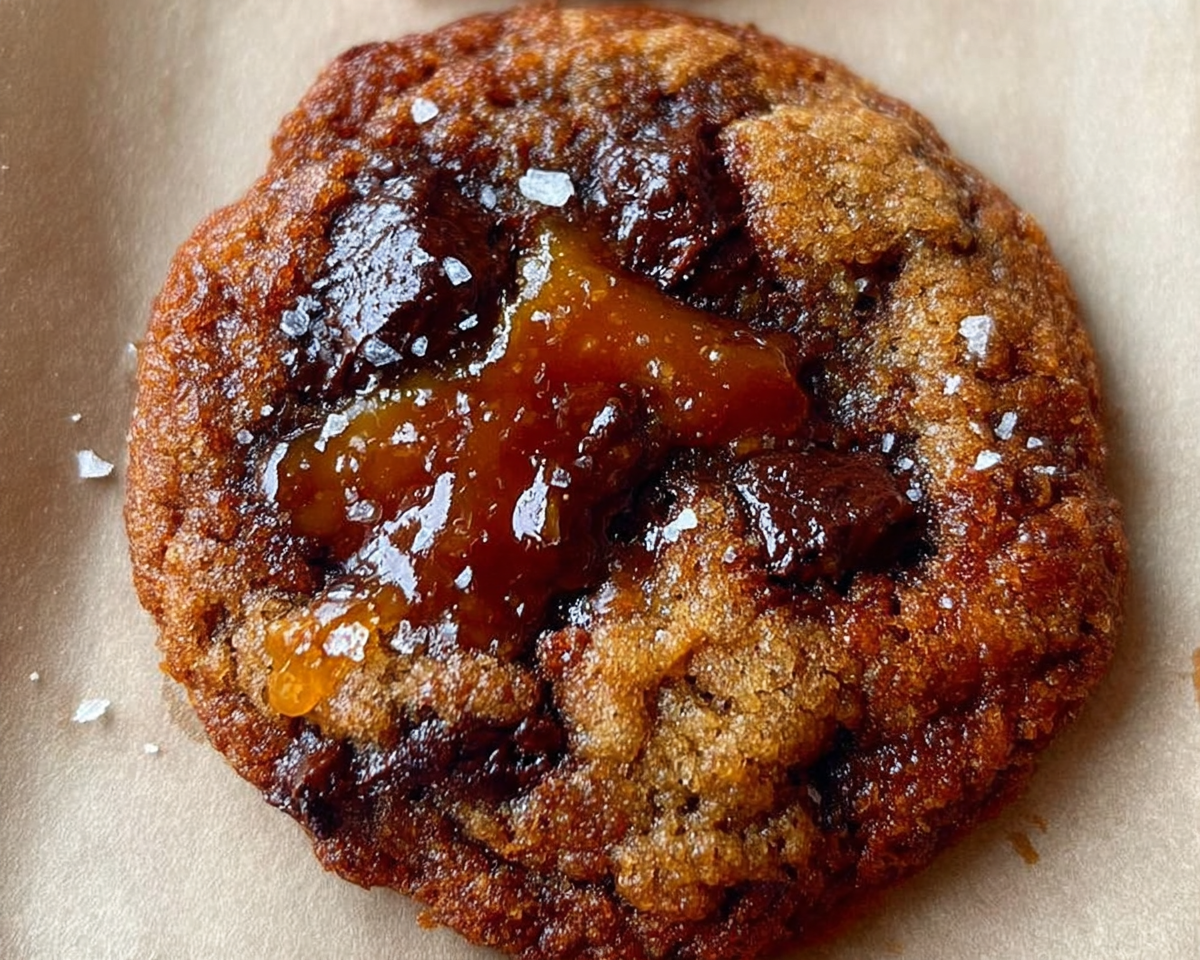
As the leaves turn golden and the air becomes crisp, I find myself craving the warm, comforting flavors of fall. That’s when I turn to my beloved Sticky Toffee Pudding Cookies. These delightful treats are inspired by the classic British dessert, sticky toffee pudding, and they bring a sense of nostalgia to my kitchen. Imagine biting into a soft, chewy cookie that bursts with the rich sweetness of dates and the indulgent drizzle of salted caramel. Each cookie is a hug in dessert form, perfect for cozy evenings spent with family or friends. Trust me, once you try these Sticky Toffee Pudding Cookies, they’ll become a staple in your home, just like they are in mine.
What is Sticky Toffee Pudding Cookies?
The origins of Sticky Toffee Pudding Cookies can be traced back to the heart of British cuisine, where the classic sticky toffee pudding has long been a beloved dessert. This rich, moist pudding, made with dates and drenched in a luscious toffee sauce, has been warming hearts and filling bellies since the 20th century. The idea of transforming this traditional dessert into cookie form is a delightful twist that captures the essence of the original while making it more accessible for everyday enjoyment.
In the world of baking, cookies often serve as a canvas for creativity, and these pudding cookies are no exception. By incorporating the sweet, caramel-like flavors of sticky toffee pudding into a cookie, I’ve created a treat that’s not only easy to make but also perfect for sharing. The chewy texture of the dates combined with the rich, buttery flavor evokes the comforting nostalgia of fall cooking, making these cookies a perfect addition to any biscuit bar or dessert table.
As I bake these cookies, I can’t help but think of the cultural significance of sticky toffee pudding in British households. It’s a dessert that brings families together, often served at celebrations and gatherings. By creating Sticky Toffee Pudding Cookies, I’m not just sharing a recipe; I’m sharing a piece of that warmth and tradition, inviting you to experience the joy of this classic dessert in a new and delightful way.
Why You’ll Love This Sticky Toffee Pudding Cookies
- Convenient and Quick: With a prep time of just 20 minutes, these cookies fit perfectly into busy schedules, making them an ideal treat for any day of the week.
- Irresistible Flavor: The combination of sweet dates and rich salted caramel creates a flavor explosion that will have everyone coming back for seconds.
- Healthier Indulgence: Using wholesome ingredients like dates not only adds natural sweetness but also provides fiber, making these cookies a more nutritious option compared to traditional desserts.
- Family-Friendly: Kids and adults alike will adore these cookies, making them a hit at family gatherings, school events, or simply as an after-school snack.
- Versatile Treat: These cookies can easily be customized with your favorite mix-ins, such as chocolate chips or dried fruits, allowing you to make them your own!
Who It’s For
These Sticky Toffee Pudding Cookies are perfect for busy families looking for a quick and delicious dessert option. They appeal to health-conscious cooks who want to indulge without the guilt, as well as food lovers eager to explore globally inspired flavors. Whether you’re a novice baker or a seasoned pro, this recipe is approachable and rewarding.
When to Cook It
These cookies are ideal for a variety of occasions. Bake them for cozy weeknight dinners, festive celebrations, or as a sweet surprise for family meals. They also make a delightful addition to a biscuit bar at parties or potlucks, ensuring there’s something for everyone to enjoy!
How to Make the Perfect Sticky Toffee Pudding Cookies
Ingredients
- 1 cup unsalted butter, softened: This is the base of your cookies, providing richness and a tender texture.
- 1 cup brown sugar: Adds moisture and a deep caramel flavor; for a richer taste, use dark brown sugar.
- 1/2 cup granulated sugar: Balances the sweetness and helps achieve a nice texture.
- 2 large eggs: Essential for binding the ingredients together and adding moisture.
- 2 teaspoons vanilla extract: Enhances the overall flavor profile with a warm, sweet aroma.
- 2 cups all-purpose flour: The main structure of the cookies; can be substituted with whole wheat flour for added fiber.
- 1 teaspoon baking soda: Helps the cookies rise and become fluffy.
- 1/2 teaspoon salt: Balances the sweetness and enhances the flavors.
- 1 cup chopped dates: The star ingredient, providing natural sweetness and a chewy texture.
- 1/2 cup chopped walnuts (optional): Adds a delightful crunch; feel free to omit for a nut-free version.
- 1 cup salted caramel sauce: Drizzle on top for an indulgent finish; you can use store-bought or homemade.
Step-by-Step Instructions
- Preheat your oven to 350°F (175°C) and line a baking sheet with parchment paper. The aroma of baking cookies will soon fill your kitchen!
- In a large bowl, cream together the softened butter, brown sugar, and granulated sugar until light and fluffy. This should take about 3-5 minutes, and you’ll know it’s ready when it looks pale and airy.
- Add the eggs one at a time, mixing well after each addition, then stir in the vanilla extract. The mixture should be smooth and creamy, with a delightful scent wafting up.
- In another bowl, whisk together the flour, baking soda, and salt. This helps to evenly distribute the leavening agent, ensuring your cookies rise perfectly.
- Gradually add the dry ingredients to the wet ingredients, mixing until just combined. Be careful not to overmix; a few lumps are perfectly fine!
- Fold in the chopped dates and walnuts, if using. The dates will add a lovely sweetness reminiscent of traditional toffee pudding.
- Drop spoonfuls of dough onto the prepared baking sheet, spacing them about 2 inches apart to allow for spreading. You’ll want to make sure they have room to grow!
- Bake for 10-12 minutes or until the edges are golden brown. The centers may look slightly underbaked, but they will firm up as they cool.
- Remove from the oven and let cool on the baking sheet for a few minutes before transferring to a wire rack to cool completely. The anticipation will be worth it!
- Drizzle with salted caramel sauce before serving for that extra indulgence!
For People with Diabetes: Sugar Substitutes
If you’re looking to reduce sugar, consider using stevia, monk fruit, erythritol, or allulose as substitutes. These options provide sweetness without the calories. However, it’s best to avoid honey or maple syrup, as they can spike blood sugar levels.
Tools You’ll Need
- Mixing Bowls: A set of various sizes will help you combine ingredients easily. If you don’t have mixing bowls, any large, deep dish will do.
- Electric Mixer: A hand mixer or stand mixer makes creaming the butter and sugars a breeze. If you don’t have one, a whisk and some elbow grease will work just fine!
- Baking Sheet: A standard baking sheet is essential for baking your cookies. If you don’t have one, a flat oven-safe dish can serve as a substitute.
- Parchment Paper: This helps prevent sticking and makes cleanup easier. If you’re out, you can lightly grease your baking sheet instead.
- Cookie Scoop or Spoon: A cookie scoop ensures uniform cookie sizes, but a regular spoon will work too if you’re in a pinch.
- Wire Rack: Ideal for cooling your cookies evenly. If you don’t have one, a plate or cutting board can do the job.
Tips from Well-Known Chefs
When it comes to baking, even the most seasoned chefs have their go-to tips to elevate their cookies. Here are some chef-approved hacks that I’ve gathered over the years to ensure your Sticky Toffee Pudding Cookies turn out perfectly every time:
- Use Room Temperature Ingredients: Many chefs emphasize the importance of using room temperature butter and eggs. This helps create a smoother batter and ensures even mixing, resulting in a better texture.
- Chill the Dough: For a thicker cookie, consider chilling your dough for at least 30 minutes before baking. This prevents the cookies from spreading too much and helps maintain their chewy texture.
- Don’t Overmix: As renowned pastry chef Pierre Hermé advises, mixing just until combined is key. Overmixing can lead to tough cookies, so be gentle when folding in your dry ingredients.
- Experiment with Flavors: Chef Ina Garten often suggests adding a pinch of sea salt on top of cookies before baking. This enhances the sweetness and adds a delightful contrast to the rich flavors of the sticky toffee.
- Quality Ingredients Matter: Chef Thomas Keller always emphasizes using high-quality ingredients. Opt for fresh dates and pure vanilla extract to truly capture the essence of your pudding cookies.
By incorporating these tips into your baking routine, you’ll not only improve your skills but also create Sticky Toffee Pudding Cookies that are sure to impress family and friends!
Delicious Variations to Customize Your Cookies
One of the joys of baking is the ability to experiment and make a recipe your own. These Sticky Toffee Pudding Cookies are no exception! Here are some delightful variations to consider, allowing you to tailor the flavors and textures to suit your preferences or dietary needs:
- Chocolate Chip Delight: Add 1 cup of semi-sweet or dark chocolate chips to the dough for a rich, indulgent twist. The combination of chocolate and toffee flavors is simply irresistible!
- Spiced Pumpkin: For a fall-inspired version, mix in 1/2 cup of pumpkin puree and 1 teaspoon of pumpkin pie spice. This will give your cookies a warm, cozy flavor that’s perfect for autumn.
- Coconut Crunch: Incorporate 1/2 cup of shredded coconut into the dough for a tropical flair. The coconut adds a chewy texture that complements the dates beautifully.
- Nut-Free Option: If you’re looking to make these cookies nut-free, simply omit the walnuts and replace them with an equal amount of rolled oats. This will add a lovely chewiness without the nuts.
- Gluten-Free Version: Substitute the all-purpose flour with a gluten-free flour blend. Make sure to check that your baking soda is gluten-free as well. This way, everyone can enjoy these delicious cookies!
- Maple Pecan: Swap out the dates for chopped pecans and add 1/4 cup of pure maple syrup to the dough. This variation brings a delightful nutty flavor and a hint of sweetness that pairs perfectly with the caramel drizzle.
Feel free to mix and match these ideas to create your own signature version of Sticky Toffee Pudding Cookies. The possibilities are endless, and each variation brings a unique twist to this classic treat!
Top Tips for Perfecting Your Sticky Toffee Pudding Cookies
As a passionate home cook, I’ve learned that the little details can make a big difference in baking. Here are some expert techniques and cooking hacks to ensure your Sticky Toffee Pudding Cookies turn out perfectly every time:
- Measure Ingredients Accurately: Baking is a science, so precise measurements are crucial. Use a kitchen scale for the best results, especially for flour and sugar. This will help you achieve the right texture and consistency in your cookies.
- Don’t Skip the Resting Time: Allowing your cookie dough to rest for at least 30 minutes in the refrigerator can enhance the flavors and improve the texture. Chilling the dough helps prevent excessive spreading during baking, resulting in thicker, chewier cookies.
- Use Fresh Dates: The quality of your dates can significantly impact the flavor of your cookies. Opt for fresh, plump Medjool dates for the best sweetness and texture. If your dates are a bit dry, soak them in warm water for 10 minutes before chopping.
- Experiment with Spice: To elevate the flavor profile, consider adding a pinch of cinnamon or nutmeg to the dry ingredients. These warm spices complement the sweetness of the dates and enhance the overall taste of your pudding cookies.
- Watch the Baking Time: Every oven is different, so keep an eye on your cookies as they bake. Remove them from the oven when the edges are golden brown, even if the centers look slightly underbaked. They will continue to firm up as they cool, ensuring a soft and chewy texture.
- Drizzle with Care: When drizzling the salted caramel sauce, use a spoon or a squeeze bottle for a beautiful presentation. This not only adds visual appeal but also ensures that every bite is infused with that rich, indulgent flavor.
- Share the Love: Baking is all about connection. Share your Sticky Toffee Pudding Cookies with friends and family, and don’t forget to ask for feedback! This not only spreads joy but also helps you refine your baking skills.
By incorporating these tips into your baking routine, you’ll create Sticky Toffee Pudding Cookies that are not only delicious but also a true reflection of your love for cooking. Happy baking!
Storing and Reheating Tips
Once you’ve baked a batch of Sticky Toffee Pudding Cookies, you’ll want to ensure they stay fresh and delicious for as long as possible. Here are some clear and practical tips for storing and reheating your cookies:
Storing Your Cookies
- Room Temperature: Store your cookies in an airtight container at room temperature for up to a week. This will keep them soft and chewy, just like when they first came out of the oven.
- Refrigeration: If you want to extend their shelf life, you can refrigerate the cookies. Just make sure they are in an airtight container to prevent them from drying out. They can last up to two weeks in the fridge.
- Freezing: For longer storage, freeze your cookies! Place them in a single layer on a baking sheet to freeze individually, then transfer them to a freezer-safe bag or container. They can be frozen for up to three months. Just remember to label the container with the date!
Reheating Your Cookies
- Microwave: To enjoy a warm cookie, pop one in the microwave for about 10-15 seconds. This will soften it up and bring back that fresh-baked feel.
- Oven: For a batch, preheat your oven to 350°F (175°C) and place the cookies on a baking sheet. Heat for about 5-7 minutes, or until warmed through. This method helps restore their chewy texture.
- Tip: If you’ve frozen your cookies, there’s no need to thaw them before reheating. Just add a minute or two to the heating time to ensure they warm through completely.
By following these storing and reheating tips, you can enjoy your Sticky Toffee Pudding Cookies at their best, whether it’s the day they’re baked or weeks later!
Helpful Notes
As you embark on your baking journey with Sticky Toffee Pudding Cookies, here are some extra clarifications and tips to ensure your experience is as smooth as possible:
- Ingredient Prep: Make sure to chop your dates and walnuts (if using) into small, even pieces. This ensures they distribute evenly throughout the cookie dough, providing a delightful texture in every bite.
- Soaking Dates: If your dates are a bit dry, consider soaking them in warm water for about 10 minutes before chopping. This will plump them up and enhance their natural sweetness, making your cookies even more delicious.
- Butter Temperature: For the best results, use butter that is softened to room temperature. This allows for better incorporation with the sugars, resulting in a lighter, fluffier cookie.
- Substitutions: If you’re looking to make these cookies dairy-free, you can substitute the unsalted butter with a plant-based butter alternative. Additionally, for a vegan version, replace the eggs with flax eggs (1 tablespoon of ground flaxseed mixed with 2.5 tablespoons of water per egg) and ensure your caramel sauce is vegan-friendly.
- Cultural References: Sticky toffee pudding is a classic British dessert that has been enjoyed for generations. It’s often served warm with a scoop of vanilla ice cream or a dollop of whipped cream. By transforming this beloved dessert into cookie form, you’re not only embracing a piece of British culinary history but also making it accessible for everyday enjoyment.
- Serving Suggestions: These cookies are delightful on their own, but for an extra special treat, serve them warm with a scoop of vanilla ice cream and a drizzle of salted caramel sauce. It’s a dessert that will impress your family and friends!
With these helpful notes in mind, you’ll be well-equipped to create the most scrumptious Sticky Toffee Pudding Cookies that will surely become a favorite in your home!
Common Mistakes to Avoid
- Overmixing the Dough: One of the most common pitfalls in cookie baking is overmixing the dough. This can lead to tough cookies instead of the soft, chewy texture we desire. Mix just until the ingredients are combined for the best results.
- Not Measuring Ingredients Accurately: Baking is a science, and precise measurements are crucial. Using too much flour or sugar can drastically change the texture and flavor of your Sticky Toffee Pudding Cookies. Always use a kitchen scale or measuring cups for accuracy.
- Skipping the Chilling Step: If you want thicker cookies, don’t skip chilling the dough. Allowing it to rest in the refrigerator for at least 30 minutes helps prevent excessive spreading during baking, resulting in a chewier cookie.
- Using Cold Ingredients: Make sure your butter and eggs are at room temperature before starting. Cold ingredients can lead to uneven mixing and affect the final texture of your cookies.
- Ignoring Baking Time: Every oven is different, so keep an eye on your cookies as they bake. Remove them from the oven when the edges are golden brown, even if the centers look slightly underbaked. They will continue to firm up as they cool.
FAQs About Sticky Toffee Pudding Cookies
Q: Can I make Sticky Toffee Pudding Cookies ahead of time?
Yes, you can prepare the dough in advance and refrigerate it for up to 3 days. This allows the flavors to meld beautifully. You can also freeze the cookie dough for up to 3 months, making it easy to bake fresh cookies whenever you desire!
Q: Are Sticky Toffee Pudding Cookies suitable for a biscuit bar?
Yes, these cookies are a fantastic addition to any biscuit bar! Their unique flavor and chewy texture will impress your guests, making them a standout option among classic cookies recipes.
Q: Can I substitute the dates in the recipe?
It depends on your preference! While dates are essential for that classic sticky toffee flavor, you can substitute them with dried figs or raisins for a different twist. Just keep in mind that the taste will vary slightly.
Q: Are these cookies gluten-free?
No, the original recipe uses all-purpose flour. However, you can easily make them gluten-free by substituting the flour with a gluten-free blend. Just ensure that your baking soda is also gluten-free!
Q: Can I use a different type of caramel sauce?
Yes, you can use any caramel sauce you prefer! Homemade salted caramel sauce adds a personal touch, but store-bought options work just as well for a quick and easy drizzle on your Sticky Toffee Pudding Cookies.
Conclusion: Final Thoughts on Sticky Toffee Pudding Cookies
As you embark on your baking journey with these Sticky Toffee Pudding Cookies, I hope you find the same joy and warmth that fills my kitchen each time I make them. These cookies are more than just a treat; they are a celebration of comfort, family, and the simple pleasures of life. I encourage you to share your creations with loved ones and make memories around the table. If you try this recipe, please leave a comment below and let me know how they turned out. Happy baking, and may your kitchen always be filled with love and delicious aromas!
Print
Sticky Toffee Pudding Cookies Recipe
- Total Time: 32 minutes
- Yield: 24 cookies 1x
- Diet: Vegetarian
Description
Deliciously soft and chewy cookies inspired by the classic sticky toffee pudding.
Ingredients
- 1 cup unsalted butter, softened
- 1 cup brown sugar
- 1/2 cup granulated sugar
- 2 large eggs
- 2 teaspoons vanilla extract
- 2 cups all-purpose flour
- 1 teaspoon baking soda
- 1/2 teaspoon salt
- 1 cup chopped dates
- 1/2 cup chopped walnuts (optional)
- 1 cup salted caramel sauce
Instructions
- Preheat your oven to 350°F (175°C) and line a baking sheet with parchment paper.
- In a large bowl, cream together the softened butter, brown sugar, and granulated sugar until light and fluffy.
- Add the eggs one at a time, mixing well after each addition, then stir in the vanilla extract.
- In another bowl, whisk together the flour, baking soda, and salt.
- Gradually add the dry ingredients to the wet ingredients, mixing until just combined.
- Fold in the chopped dates and walnuts, if using.
- Drop spoonfuls of dough onto the prepared baking sheet, spacing them about 2 inches apart.
- Bake for 10-12 minutes or until the edges are golden brown.
- Remove from the oven and let cool on the baking sheet for a few minutes before transferring to a wire rack to cool completely.
- Drizzle with salted caramel sauce before serving.
Discover my favorite kitchen tools I always use.
Notes
- Store cookies in an airtight container for up to a week.
- For a richer flavor, use dark brown sugar instead of light brown sugar.
- These cookies can be frozen for up to 3 months.
- Prep Time: 20 minutes
- Cook Time: 12 minutes
- Category: Dessert
- Method: Baking
- Cuisine: British
Nutrition
- Serving Size: 1 cookie
- Calories: 150
- Sugar: 10g
- Sodium: 100mg
- Fat: 7g
- Saturated Fat: 4g
- Unsaturated Fat: 2g
- Trans Fat: 0g
- Carbohydrates: 20g
- Fiber: 1g
- Protein: 2g
- Cholesterol: 30mg