Sailboat Baby Blanket
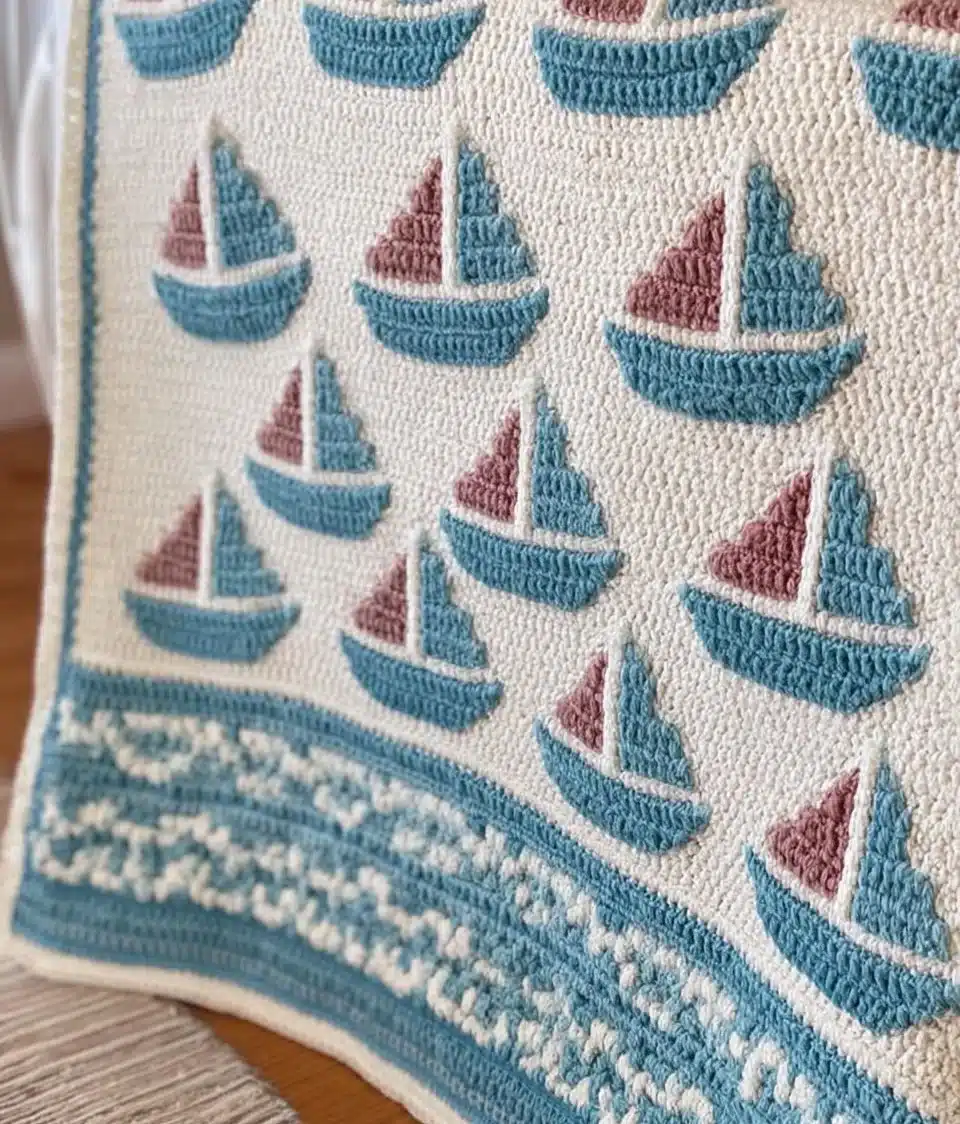
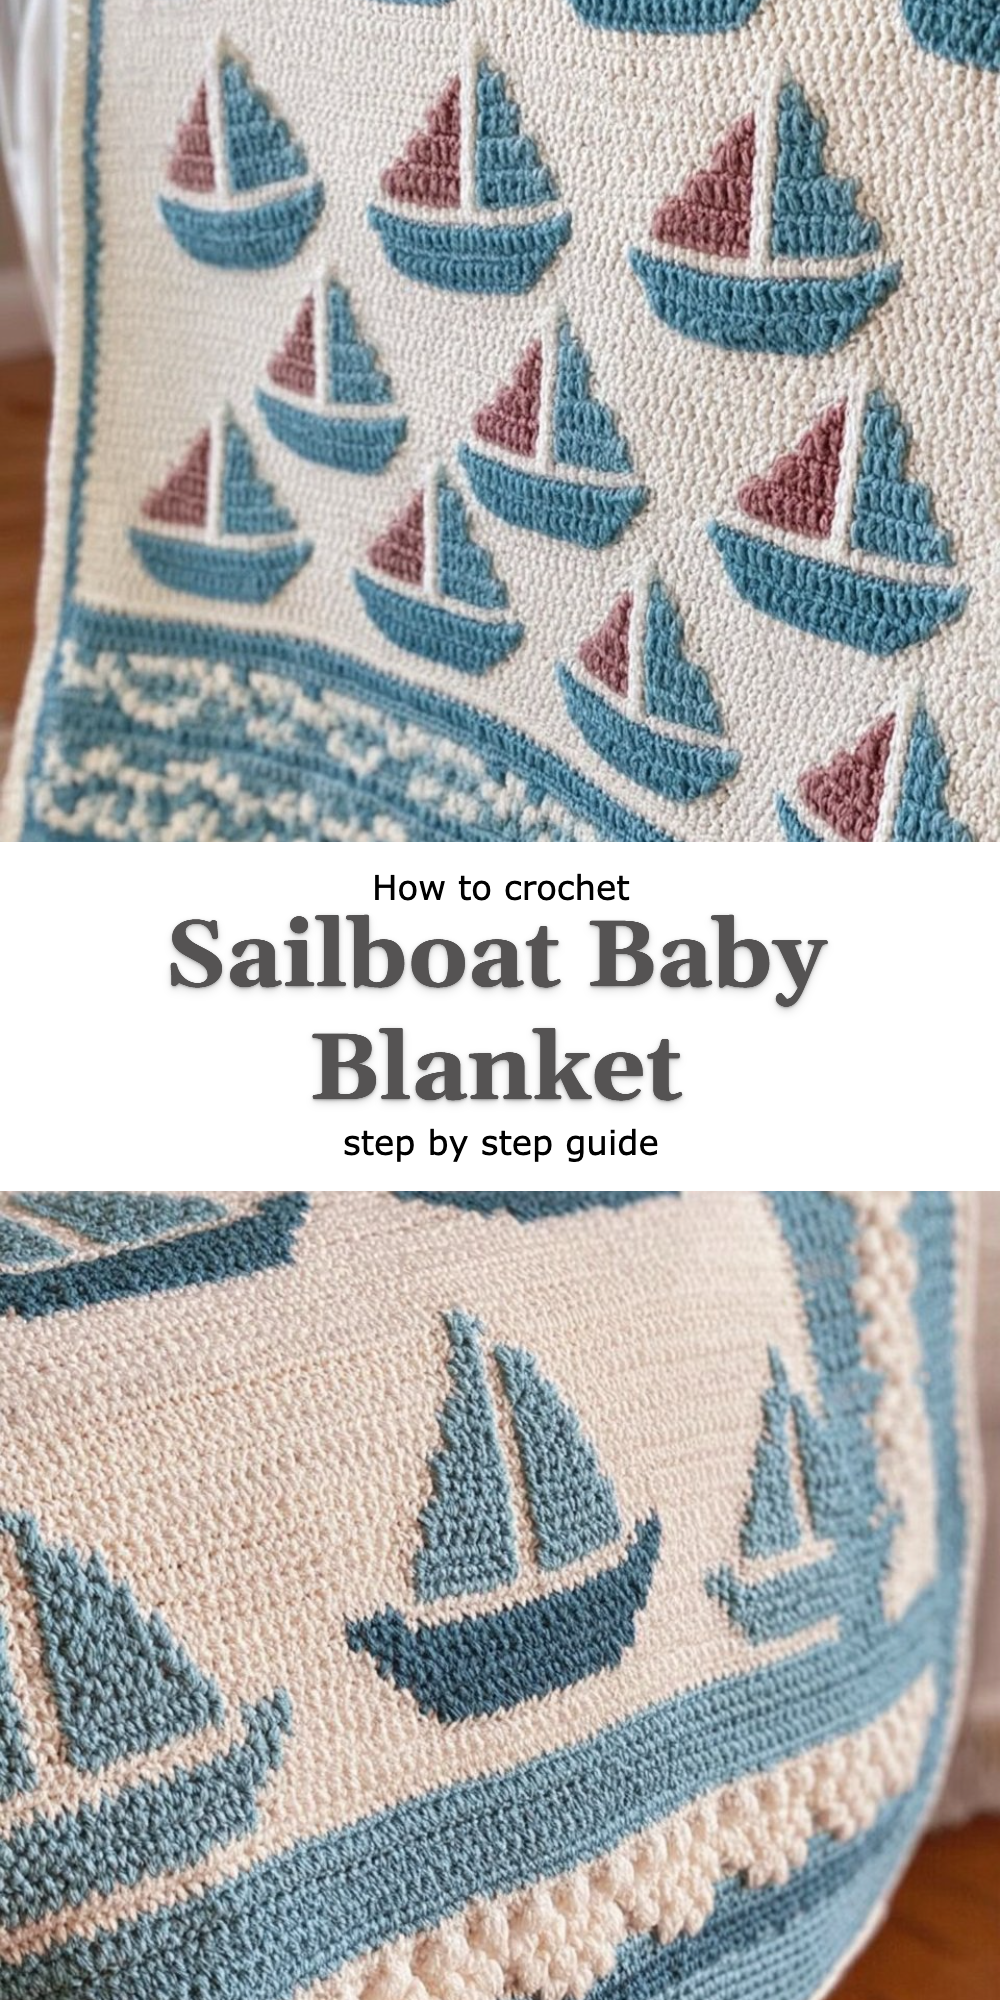
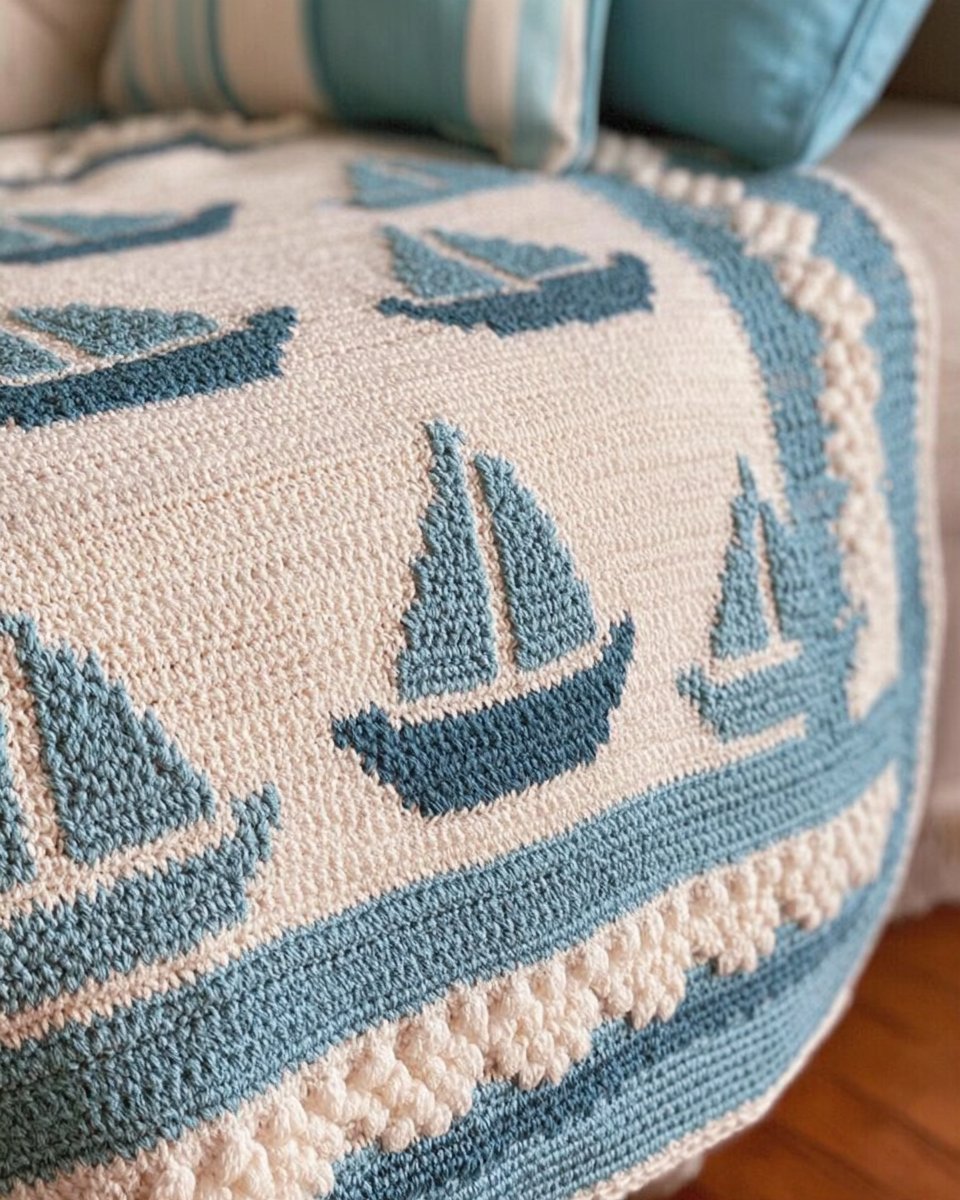
As I settle into my cozy chair, a cup of tea steaming by my side, I can’t help but feel excited to share with you a crochet journey that has become a deeply personal project of mine—the Sailboat Baby Blanket. This delightful creation is not just a blanket; it’s a whimsical ode to the serene beauty of sailboats dancing on the horizon, a gentle reminder of warm breezes and sunny days. Its vibrant blue and white mosaic design brings a unique flair, effortlessly elevating it from a standard baby blanket to a treasured heirloom.
This free pattern is crafted with love and care, guiding you step by step through the process. Whether you’re a seasoned crocheter or a curious beginner, the Sailboat Baby Blanket is approachable and offers a satisfying challenge that’s great for honing your skills. Let’s embark on this colorful adventure together!
Why The Sailboat Baby Blanket Feels Different
The reversible crochet technique used in the Sailboat Baby Blanket creates a rich texture and a stunning visual appeal that you won’t find in your average blanket. The way the yarn interlocks produces a fabric that is not only soft but also sturdy, making it perfect for cozying up little ones.
What makes this variation worth trying:
- Unique mosaic pattern elevates the design, making it a standout piece.
- Reversible texture offers two beautiful sides, so you can choose which to display.
- Increased durability ensures that the blanket can withstand the daily rigors of childhood.
- Adaptable size allows for customization, whether for a bassinet or a crib.
What You’ll Need: Materials Table
Before we begin, let’s gather our supplies to create the beautiful Sailboat Baby Blanket. Having everything ready will make your crafting experience enjoyable and fluid.
| Item | Recommended Type | Approximate Amount |
|———————–|——————|——————–|
| Yarn | Blue and white yarn | 4 skeins (approximately 400-500 yards) |
| Crochet Hook | Size I/9 (5.5 mm) | 1 |
| Scissors | Sharp scissors | 1 |
| Tapestry Needle | Blunt-tipped needle | 1 |
Feel free to substitute with your favorite materials—acrylic is great for easy washing, while a wool blend offers extra warmth.
Sizing Guide
For this pattern, the Sailboat Baby Blanket can be easily adjusted in size. Whether you’re preparing for a newborn or a toddler, it’s all about personal choice.
| Size/Age Range | Dimensions |
|—————–|——————|
| Newborn | 30” x 36” |
| Infant | 36” x 48” |
| Toddler | 48” x 60” |
Remember to create a swatch to check your gauge; it’ll help ensure your blanket comes out the perfect size.
Step-by-Step: How to Crochet the Sailboat Baby Blanket
Step 1: Start the Foundation
- Choose your colors of yarn—I find that a combination of bright blue and soft white brings out the sailboat theme beautifully.
- Create a slip knot using your preferred yarn.
- Chain a length that corresponds to your desired width. For a toddler blanket, this might be around 100 chains.
Step 2: Crochet the Core Technique Section
- Follow the reversible crochet pattern: Start working in the stitch pattern of your choice (e.g., alternating single crochet and double crochet).
- Continue the pattern until you’ve reached a height of approximately 36 inches for a standard baby blanket size.
- Take your time; enjoy the rhythm of the stitches and the soothing flow of yarn through your fingers.
Step 3: Crochet the Shaping/Assembly Section
- Continue crocheting until the blanket reaches your desired size; for my toddler’s blanket, I aim for around 48 inches in height.
- Adjust your stitches only when absolutely necessary, to keep the integrity of the mosaic pattern.
- It’s important to remain mindful of your tension here for an even finish.
Step 4: Add the Finishing Touches
- Finish off the edges with a simple border of single crochet around the entire perimeter if desired.
- Weave in any loose ends using the tapestry needle for a tidy finish. This step makes all the difference!
- Block your blanket by lightly steaming it to help the stitches settle into place for an even look and feel.
Tips for Clean, Even Stitching
- Maintain consistent tension throughout your work to prevent uneven stitches.
- Use stitch markers to keep track of pattern repeats, especially in large projects.
- Practice with a swatch before beginning the main piece to gauge your needle and yarn choice.
- Align your stitches carefully and double-check your rows to keep your design looking sharp.
Common Mistakes to Avoid
- Skipping gauge swatch — leads to incorrect sizing and fit.
- Uneven tension in stitches — results in a lumpy, bumpy blanket.
- Forcing stitches into a tight space — might create an awkward appearance and difficulty in the final product.
- Not counting stitches — may throw off your pattern and create unnecessary corrections down the line.
Frequently Asked Questions
What is the reversible crochet technique?
It’s a method where both sides of the fabric are visually appealing, offering a unique finish compared to standard crochet patterns.
What yarn should I use?
I recommend using a soft and durable yarn like acrylic or cotton, but feel free to experiment with blends that suit your taste and needs.
Is the Sailboat Baby Blanket difficult?
Not at all! This pattern is approachable for beginners looking to expand their crochet skills while embracing a creative twist.
How much yarn will I need for the Sailboat Baby Blanket?
Approximately 400-500 yards works well, depending on your desired size and stitch density.
Can I use this technique for other patterns?
Absolutely! Once you master the reversible crochet technique, feel free to experiment with other designs and projects to expand your crochet repertoire.
Conclusion
The Sailboat Baby Blanket is a project that captures both beauty and practicality, making it a perfect gift or addition to your home. The unique reversible design and textured stitches not only make it special but also bring warmth and joy to those who use it.
I encourage you to embark on this crochet journey and share your finished Sailboat Baby Blanket with our vibrant community. Let’s inspire one another as we create pieces filled with love and warmth, one stitch at a time!