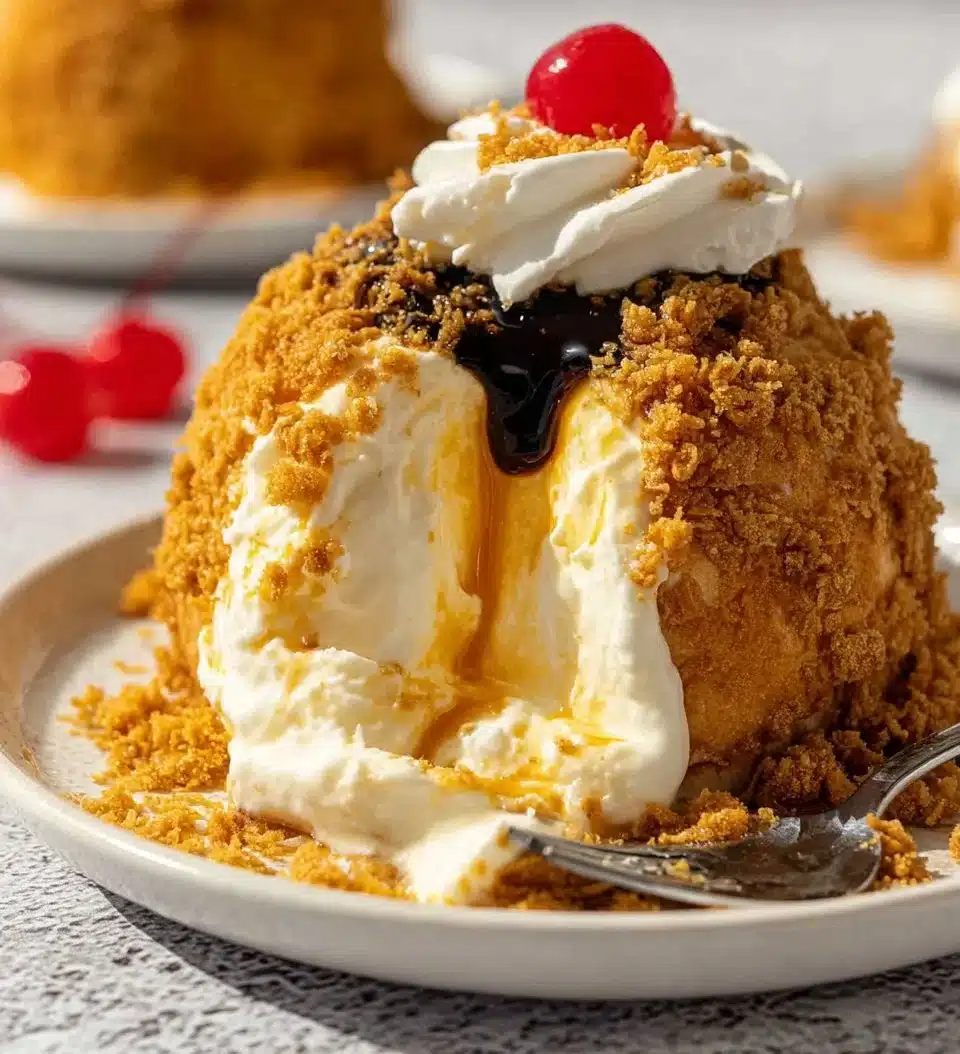
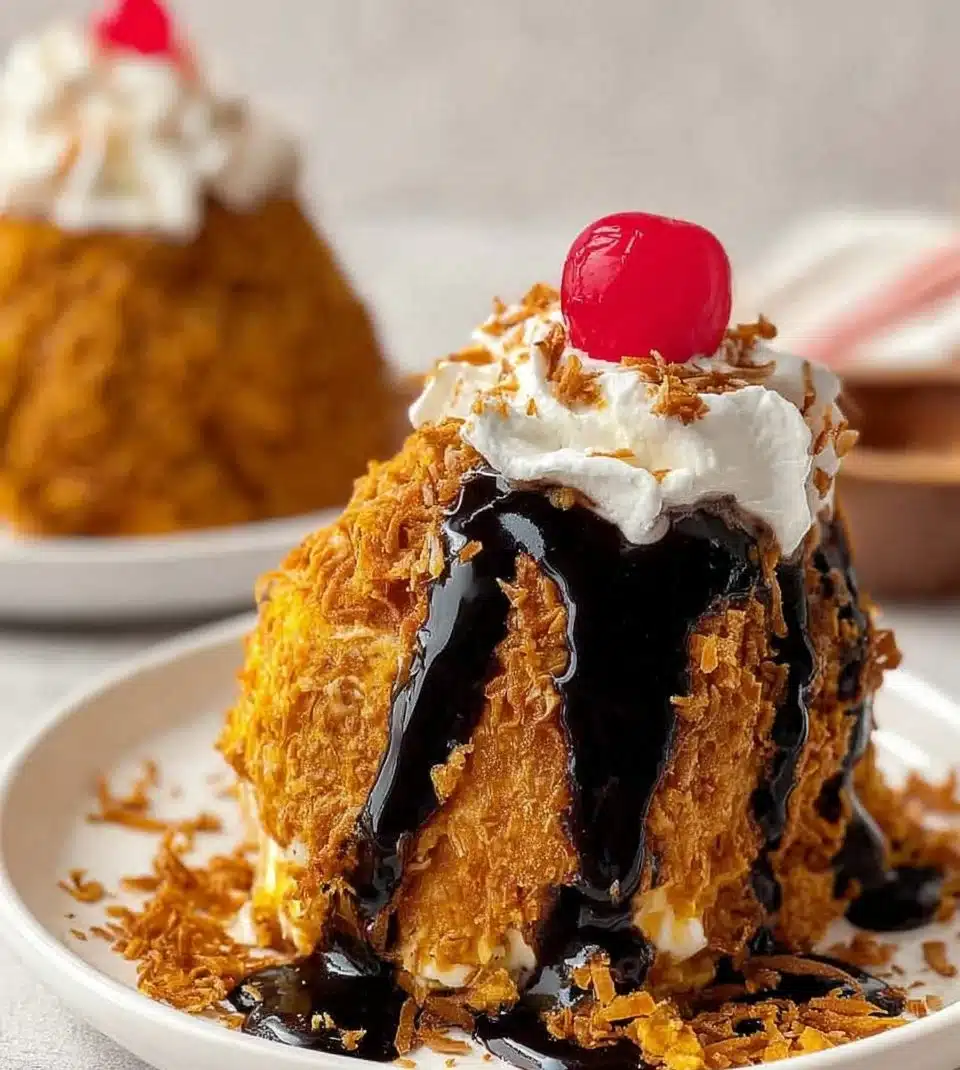
Fried Ice Cream
This post may contain affiliate links, learn more.
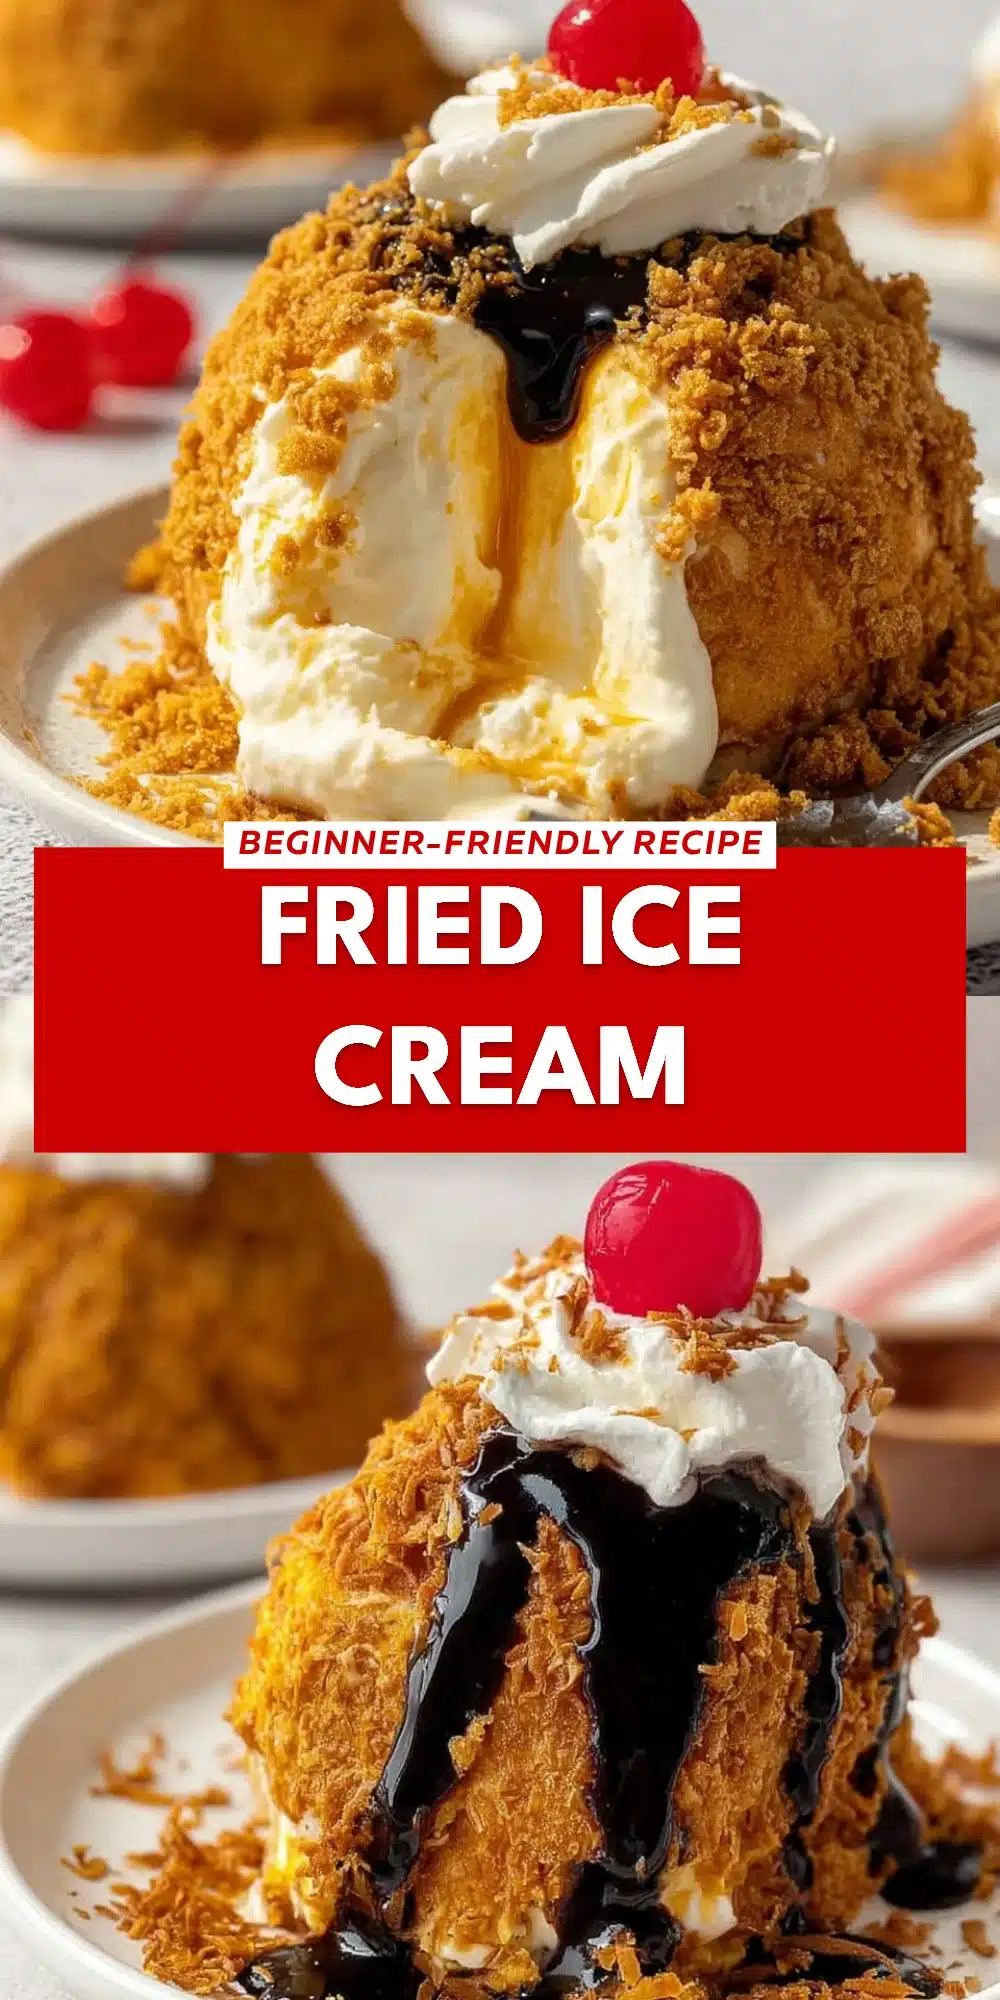
There’s something enchanting about the idea of biting into a cold, creamy ball of ice cream and discovering a crispy shell that melts away, giving way to a flavor explosion. The first time I had Homemade Fried Ice Cream, it was as if I had stumbled upon dessert heaven. The contrasting textures of the hot, crunchy outer layer and the cold, luscious ice cream within took my taste buds on an unexpected adventure. This extraordinary treat not only delights in flavor but also brings back memories of lively family gatherings, making it a cherished part of my dessert repertoire.
Making Homemade Fried Ice Cream is an exciting culinary journey that you can embark on right in your kitchen. It is a dessert that feels special and indulgent but is surprisingly simple to create. As the warm, aromatic scents of fried cornflakes fill your kitchen, you’ll find yourself transported to a nostalgic place filled with laughter, cheerful conversations, and the squeals of delight from dessert-loving children. Today, let’s explore this delightful dish together, and before you know it, you’ll not only perfect the art of Homemade Fried Ice Cream but also create beautiful memories around the dinner table.
What is Homemade Fried Ice Cream?
Homemade Fried Ice Cream is a brilliant dessert that combines the joy of ice cream with the delightful crunch of a golden coating. While it is a popular item in many Mexican restaurants and Asian buffets, its origins are inspired by various cultures that celebrate desserts in unique ways. The crisp exterior contrasts beautifully with the cold, creamy ice cream, creating a delightful experience that’s hard to resist. With its playful combination of temperatures and textures, Homemade Fried Ice Cream is truly a testament to the sheer fun of cooking.
Why You’ll Love This Homemade Fried Ice Cream
- Flavor Explosion: The rich, sweet ice cream bursting with flavor paired with the airy crunch of cornflakes makes each bite unforgettable.
- Family Activity: This recipe is perfect for involving children in the kitchen, turning dessert-making into a fun family event.
- Quick Preparation: With a few hours of freezing, you can create a restaurant-quality dessert in your home kitchen.
- Versatile Options: You can customize your ice cream flavor and toppings, allowing everyone to enjoy their favorite versions.
Who It’s For
- Busy families looking to create special memories around dessert time.
- Aspiring home cooks eager to impress with a unique treat.
- Food lovers and adventurers who love to try new and exciting recipes.
- Those seeking a recipe that easily accommodates various dietary preferences by swapping ice cream flavors.
Perfect Moments to Enjoy Homemade Fried Ice Cream
- Cozy family nights when you want something fun and indulgent.
- Birthday parties where a creative touch can elevate the celebration.
- Summer gatherings, bringing a refreshing treat to warm days.
- Holidays, providing a unique dessert option that dazzles guests.
How to Make the Perfect Homemade Fried Ice Cream
Creating Homemade Fried Ice Cream is not only about the final dish but also about the process that brings joy and laughter into the kitchen. Here’s how you can make magic happen at home.
Ingredients
- 1 pint of ice cream (your choice)
- 2 cups cornflakes, crushed
- 1 teaspoon ground cinnamon
- 1 cup all-purpose flour
- 2 eggs, beaten
- 1 teaspoon vanilla extract
- Oil for frying
- Chocolate sauce (for drizzling)
- Whipped cream (for serving)
Step-by-Step Instructions
- Scoop ice cream into small balls and freeze until solid, about 2 hours.
- Mix crushed cornflakes with cinnamon in a shallow dish.
- Add flour into another bowl.
- Combine beaten eggs with vanilla in a third bowl.
- Roll each ice cream ball first in flour.
- Dip each ball in the egg mixture.
- Coat with the cornflake mixture.
- Freeze the coated balls for an additional 30 minutes.
- Heat oil in a deep pan over medium heat.
- Fry the ice cream balls for a few seconds until golden brown.
- Remove and drain on paper towels.
- Serve immediately with chocolate sauce and whipped cream.
For People with Diabetes: Sugar Substitutes
If you’re looking to make a healthier version, consider using sugar substitutes like stevia, monk fruit, or allulose. However, it’s best to avoid sweeteners like honey or maple syrup, as they often contain more calories and carbs.
Must-Have Tools for This Recipe
- Deep pan for frying
- Shallow dishes for coating
- Ice cream scoop for uniform balls
- Mixing bowls for preparation
- Cooking thermometer (optional for oil temperature)
Pro Tips to Elevate Your Homemade Fried Ice Cream
- Freeze Longer: For best results, freeze the balls overnight; this allows for a better texture when frying.
- Controlling Temperature: Ensure your oil is hot enough (around 350°F) for instant frying to prevent the ice cream from melting too quickly.
- Toppings Galore: Be adventurous with toppings—try crushed nuts or flavored syrups along with the chocolate sauce for added flair.
- Test Fry: Fry one ball first to gauge the oil temperature and adjust as necessary.
Common Mistakes to Avoid
- Skipping the Freeze: Don’t skip the freezing steps; they are crucial for achieving the desired texture.
- Not Coating Properly: Ensure each ball is thoroughly coated to create a barrier that protects the ice cream.
- Improper Oil Temperature: Frying at too low a temperature can lead to sogginess—maintain a high enough temperature to get that beautiful golden brown.
FAQs About Homemade Fried Ice Cream
- Can I use any flavor of ice cream? Yes, you can use any flavor of ice cream to personalize your dessert experience.
- Is it possible to make this dessert healthier? It depends, but you can opt for low-fat ice cream and sugar substitutes to make it lighter.
- Can I prepare these ahead of time? Yes, you can prepare the ice cream balls a day in advance and fry them just before serving.
- Do I need a deep fryer? No, a deep pan works perfectly fine for frying; just ensure you have enough oil to submerge the balls.
- Can leftovers be stored? No, this dessert is best enjoyed fresh, as the texture changes once fried and cooled.
Conclusion: Final Thoughts on Homemade Fried Ice Cream
Homemade Fried Ice Cream is not just a simple dessert; it’s a beautiful memory waiting to unfold in your kitchen. With each crispy bite, you can enjoy a moment of bliss and nostalgia that draws everyone closer. I encourage you to share your experiences with this recipe in the comments below, and don’t forget to share your delightful creations with friends and family!
Homemade Fried Ice Cream
- Total Time: 125 minutes
- Yield: 4 servings 1x
- Diet: Vegetarian
Description
Experience the joy of ice cream wrapped in a crispy, fried coating with this delightful Homemade Fried Ice Cream recipe.
Ingredients
- 1 pint of ice cream (your choice)
- 2 cups cornflakes, crushed
- 1 teaspoon ground cinnamon
- 1 cup all-purpose flour
- 2 eggs, beaten
- 1 teaspoon vanilla extract
- Oil for frying
- Chocolate sauce (for drizzling)
- Whipped cream (for serving)
Instructions
- Scoop ice cream into small balls and freeze until solid, about 120 minutes.
- Mix crushed cornflakes with cinnamon in a shallow dish.
- Add flour into another bowl.
- Combine beaten eggs with vanilla in a third bowl.
- Roll each ice cream ball first in flour.
- Dip each ball in the egg mixture.
- Coat with the cornflake mixture.
- Freeze the coated balls for an additional 30 minutes.
- Heat oil in a deep pan over medium heat.
- Fry the ice cream balls for a few seconds until golden brown.
- Remove and drain on paper towels.
- Serve immediately with chocolate sauce and whipped cream.


Notes
For a healthier option, use low-fat ice cream and sugar substitutes. Ensure the oil is hot enough for frying to prevent the ice cream from melting too quickly.
- Prep Time: 120 minutes
- Cook Time: 5 minutes
- Category: Dessert
- Method: Frying
- Cuisine: American, Mexican
Nutrition
- Serving Size: 1 serving
- Calories: 300
- Sugar: 20g
- Sodium: 200mg
- Fat: 15g
- Saturated Fat: 7g
- Unsaturated Fat: 5g
- Trans Fat: 0g
- Carbohydrates: 40g
- Fiber: 2g
- Protein: 4g
- Cholesterol: 80mg